Robert R. Pavlis
Girard, Kansas 66762 USA
Mikmed Modular Microscope
The Russian LOMO Mikmed* modular microscopes have been sold worldwide for several years at very reasonable prices. Because these microscopes are modular they are sold in a variety of configurations. The general quality of these instruments is rather high, especially when one considers the low price for which they are sold. The optical parts are generally extraordinarily good. Although the microscope itself contains a few plastic parts, the plastic that is used is generally used fairly intelligently. *Known as the Biolam in Europe.
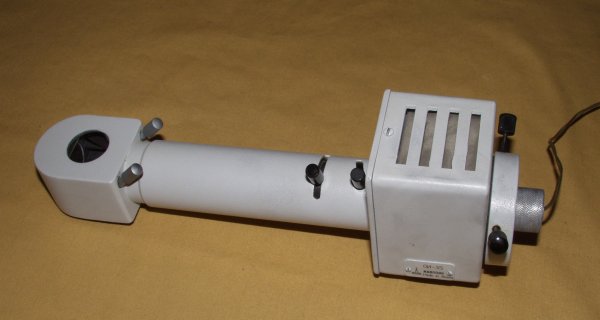
Many of these microscopes are sold with a peculiar external Köhler illumination system that consists of a tube about 30 cm long that fits under the stage and fits into a circular aperature in the base of the microscope. The design of this peculiar illuminator is really very clever, and the quality of construction of these illuminators is fairly high, though perhaps a bit below the standard of the microscope itself. Certainly the worst fault of this device is the fact that the standard incandescent bulbs supplied with it are of extraordinarily poor quality. It has an oddly shaped filament, and the glass envelopes are poorly made so that the image of filament could not possibly be used for true Köhler illumination. One quickly learns that it is very difficult to find another type of bulb that will both fit the illuminator and utilise the odd 9 Volt power supplies so common on items of Russian origin. Köhler illumination is impossible at most powers because of the bad design and workmanship of the bulb. (Note: The problems with the standard bulbs are illustrated in this Micscape article.)
In the February 2006 issue of Micscape, I described machining a special holder for 3 Watt "Star" LEDs for the Wild M40. The Wild M40 illuminator has a built in diffuser, but the Mikmed Köhler illuminator does not. The 3 watt white LEDs seem to have rather uniform illumination surfaces, so it seemed feasible to dispense with any type of diffuser and to use the undiffused light of the LED itself as the Köhler source. Unlike the Wild microscope illuminator, this LOMO illuminator permits centring the light source.
There is still another good reason to convert these microscopes to star LED illuminiation: The Mikmeds are light and relatively portable. Since star LEDs consume little power, they can be used with battery supplied power and still have the battery last for several hours. Thus a Mikmed with Star LED illuminator can be a good field instrument.
The first step in this project is to cut a piece of aluminium rod 25 mm in diameter to a length of 70 mm. Centre drill each end. Mount in lathe chuck, and support the other end with a live centre (or adequately lubricated dead one.)
First turn at least 30mm wide area down a bit to make a nice surface. It is best to knurlise it after doing this. Turn the piece around in the lathe, and then very carefully turn down a strip 50 to 52mm wide to 22.95 millimetres in diameter. This diameter must be quite exact so that the piece makes a snug but smooth fit into the illuminator tube.
Drill and tap two holes for 3mm screws on top the 22.95 millimetre end to match exactly the slots on the LED. Mill a narrow slot across the same end to match the slot in the LED that will carry the wires.
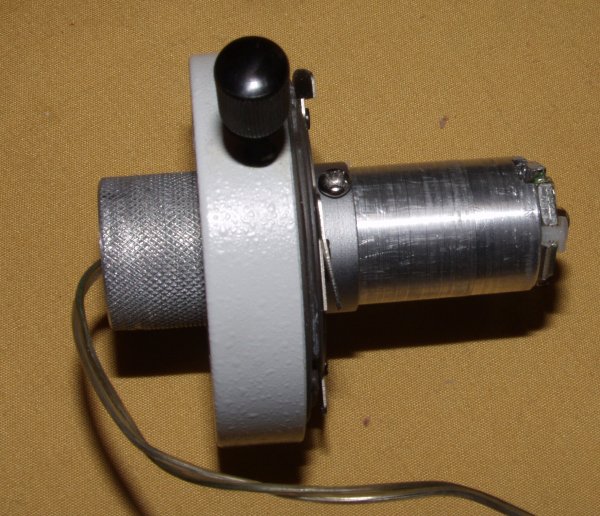
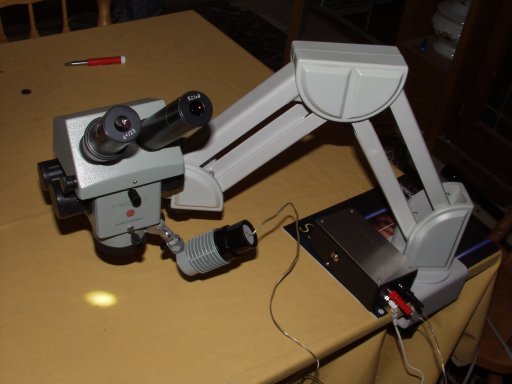
Pull out the bulb assembly from the illuminator. Twist the bayonet end from the illuminator and insert the machined part into it. With it in place carefully drill a hole though the inside part of the bayonet piece and into the machined part with a drill for 3mm taps. After the drill begins to go into the machined part, remove it from the bayonet piece and drill about 8 millimetres into the piece. Tap this with a 3mm tap. This will serve to hold the LED holder inside the illuminator after it is finished. (This screw is visible on the image above this text.)
Drill a hole all the way through the piece through the marks made with the centre drills at the start of the machining operation. This must be large enough to hold the wires, and should not be much larger than that.
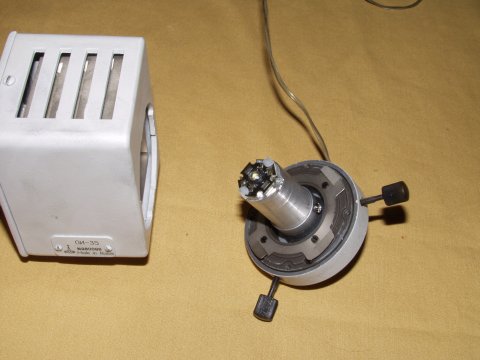
Carefully solder wires to the LED. Pull the wires through the piece just machined, and screw down the LED with 3mm plastic screws. You may have to trim the edges of the screws after tightening them down so that they will fit into the illuminator socket. (See below for using metal screws for this.)
Place the new LED holder into the bayonet piece, and install the 3mm screw to hold it in place. Place the bayonet piece into the socket on the holder and the projbect is finished.
Connect a suitable power supply being sure to observe correct polarity. If you intend to use this for field work, the best thing to use is 4 rechargeable cells. Since their combined voltage is about 5.0 volts, one must place a 2.5 ohm resistor in series with them. You can also use 3 non-rechargeable ones or a 4.5 volt power DC power supply, and use a 2.0 ohm resistor. (See below on how I constructed a dimmable system.) There are many possiblities for doing this, just be sure that the current through the LED does not go much above 700 mA.
The centring adjustments on the illuminator permit moving the LED around in front of the illuminator condenser for optical alignment.
3 Watt LEDs are bright enough to use with high power oil immersion lenses, they are so bright, in fact, that one soon discovers that the power supply should have some provision for dimming the LED!
The focusing mechanism, iris diaphragm, the centring screws on the bayonet holder, and the two screws on the part of the illuminator that fits under the microscope screws can be used to align the LED and then focus it unto the image plane.
The illuminated area is just large enough to fill the entire field at 10X. When the illuminator is properly centred, and focussed the illuminated field seems quite uniform to the naked eye at all powers from 10X to 90X. It is more difficult to get a perfectly uniform field when imaging, either photographically or electronically.
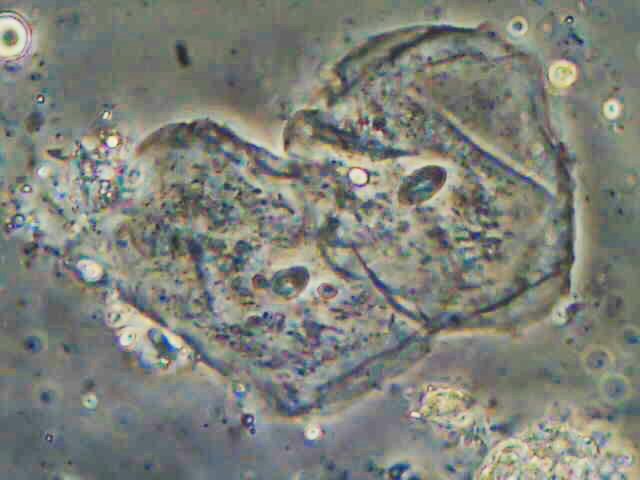
The image above shows cheek cells imaged with an inexpensive microscope camera with illumination from this system. The background image shows a small protozoan imaged the same way. (This is one of the cameras that uses a "Webcam" chip.)
Phase contrast systems are generally optimised for green light. Because of this I made two of these LED assemblies, one with a white one, and one with a green. The 3 watt Star LEDs other than white ones seem to have a "stratified" illuminated surface. I did not attempt to place a diffuser in front of the green LED because I was able to get an evenly illuminated field (and light cone) by moving around the centring screws and other adjustments. The image was excellent even with the 90X objective and 1350X total power. Although the illuminated area of the green LED is somewhat "stratified" it is still far better than any incandescent bulbs, except for the ribbon filament bulbs that were often used in older illuminators.
Instead of using plastic screws to attach the LED to the aluminium body I used steel screws on the second one and used nylon washers to prevent shorting out the LED. This works just as well as using plastic screws without washers.
Both the white and green 3 watt LEDs are sufficiently bright to enable phase contrast viewing at 1350X. This simple project dramatically improved the Mikmed. It also converts the peculiar Mikmed illuminator from a curiosity into a first rate illuminator.
MBS-10 (Sold by LOMO)
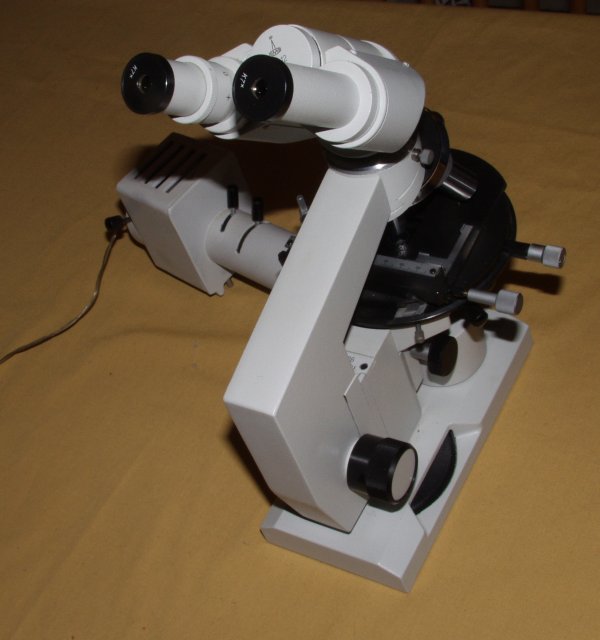
The MBS-10 is a very rugged binocular microscope with truly outstanding optical quality. Some of the ones sold recently seem virtually identical, but with a different model number, SF-100. They have an odd appearance. The oculars, oddly, are the same diameter as standard TELESCOPES, not other microscopes! Although these instruments are quite inexpensive, their overall quality is really better than many similar microscopes that cost five to ten times as much. However, the standard model also uses the same low quality miserable nine volt incandescent bulbs used on the Mikmed. The quality of the other electrical components is also extraordinarily low, lower even than those used on the Mikmed. When these instruments still have their original illuminators they are crying for something to be done to get rid of both the electrical components and the trash quality bulbs.
The normal MBS-10 illuminator can be placed under the stage for substage illumination, or in a special overhead holder for illumination from above. Fortunately the lamp housing is of fairly decent quality, unlike the trash quality bulbs and electrical parts.
The dimensions and machining necessary to convert to 3 watt LEDs are identical as for the Mikmed! As in the one for the Mikmed, the piece can be mounted inside the illuminator housing by securing it with a 3mm screw. The original illuminators get very hot and the bulbs have an unusually short life. The illuminator does not even become warm to the touch after hours of operation after a 3 watt LED is installed.
I have one of these instruments at home. The converting it to a 3 watt LED illuminator dramatically improved it. These instruments are large and are made with heavy castings. They are truly rugged. Unfortunately they are very large and consequently not very well suited for field use.

There is another one of these instruments at the University at which I am a faculty member. The one there has a fibre optic illuminator. The original quality of the electrical parts on this illuminator was worst I have ever seen anywhere on anything! (Ever!) A graduate student and I discarded all the electrical parts from this one and replaced them with higher quality parts. We did not leave even one original component, as absolutely everything electrical on this instrument was pure unadultrated trash! The only electrical part that seemed to have any quality at all was the transformer, but this was discarded too because it delivered 9 volts. We did this before high wattage LEDs were available. I suspect that a 3 watt or 5 watt LED would probably be bright enough for use in this instrument. We discovered that the 9 Volt halogen bulb originally on the instrument was the same size as a standard 12 V one made by Phillips. 9 volt bulbs of this sort are extremely difficult to obtain, and like other Russian bulbs they seem of wretched quality. (Dramatically unlike the optics in this system and the Mikmed.) We replaced the 9V transformer with a 12 Volt one and used the Phillips halogen bulb instead. The original wires were pieces of string wrapped with metal foil. These were trash to begin with, so we put them in with the rest of the trash where they should have been in the first place! During the two or so years that this instrument was in use prior to this conversion the electrical parts were malfunctioning almost daily. Now it is completely stable and in constant trouble free use. In fact since our modification it has never had even a momentary problem, it has not even required a replacement bulb. We originally had several of the original Russian 9V quartz bulbs, none of them every lasted very long.
These microscopes, according to an Ukrainian student, are produced in the Ukraine under contract from LOMO in an arsenal in Kiev that manufactures tanks. Except for the miserable electrical system these microscopes are built like them! The optical parts are first rate. The act of placing all electrical parts including incandescent bulbs in the trash can convert one of these microscopes into an extremely rugged first rate instrument!
After these instruments have had all the electrical components placed in the trash and replaced with decent quality ones, they are truly top of the line instruments. I would call one a truly champagne of instrument at a beer price!
Simple Power Supply for Star LEDs
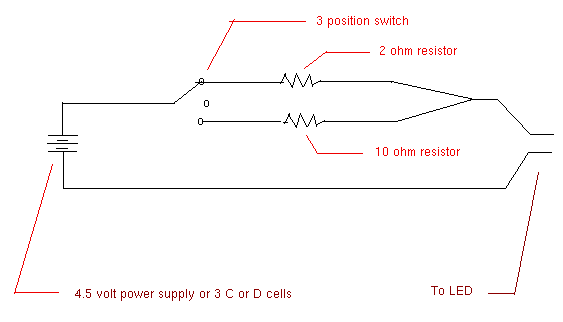
Electronics and electrical supply stores often sell 4.5 volt power supplies. For a 3 watt Star LED this will require one that provides at least 700ma.
The illuminator will require the following parts:
The image shows the set up for use with 4.5 V power supply or 3 C or D cells. Another option is to use 4 rechargeable metal hydride cells instead. This will produce 5 volts, and require that the small resistor be changed to 2.5 or so ohms.
I have made two illuminators like this. I made one slightly differently in that I used two one ohm resistors, one used like the one shown on the diagram, and the other across the negative lead.
All comments to the author Robert Pavlis are welcomed.
Microscopy UK Front Page
Micscape Magazine
Article
Library
Please report any Web problems or offer general comments to the Micscape Editor .
Micscape is the on-line monthly magazine of the Microscopy UK website at Microscopy-UK