|
THE MATHIAS ARROW A VERSATILE OBLIQUE LIGHTING DEVICE |
|
|
|
|
THE MATHIAS ARROW A VERSATILE OBLIQUE LIGHTING DEVICE |
|
|
Oblique lighting in its many variants is one of the most
useful techniques that can be used by the amateur (and the professional)
to examine microscopical subjects. | ||||||||||
| I categorise as oblique lighting all the devices that use light from the margins of some type of dark and opaque stop, which include the central circular dark field stops, the classical offside hole in an opaque disc, the marginal oblique lighting (homemade phase contrast as Sterrenburg describes), the Rheinberg filters, and the refined Circular Oblique Lighting (COL) diaphragms of Paul James. | ||||||||||
| Used wisely these cheap handmade devices provide the microscopist with the opportunity to enhance details of their transparent subjects, and even to add color to some of them. | ||||||||||
| All are more or less elaborate and need careful centering and adjusting of the condenser that make these techniques as much an art as science. | ||||||||||
| Surfing the Web as usual in search of novelties, I came across an article by Erhard Mathias that describes two unusual devices to obtain contrast enhancement of transparent materials. I cant try one of them (the 'diffraction contrast' device) even if it is the more promising, because the objectives of my microscope are not appropriate for the modification. | ||||||||||
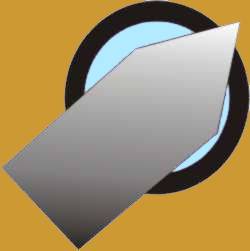
| But the other one, his 'darkfield - wedge' was within my reach as it is for all amateurs that want to try it. | ||||||||||
| Mathias proposes that a piece of 3 x 7 cm of any opaque material be cut at one end as an arrow point of 45º. Thats all. This is what I call the 'Mathias Arrow'. | ||||||||||
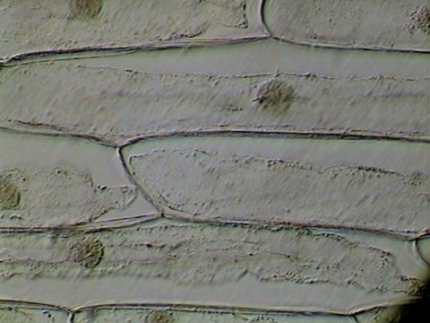
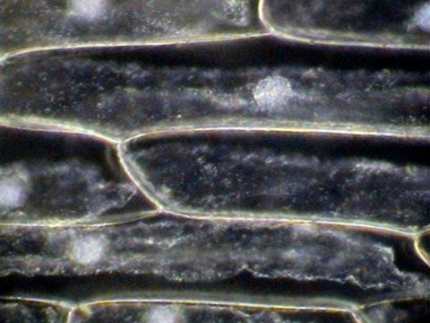
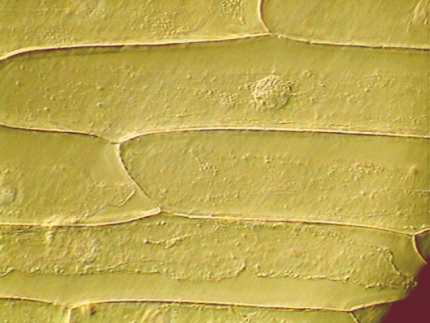
| I have a test slide made with a piece of onion skin first submitted to osmotic stress, fixed in Russell fixative, and mounted in PVA-Glycerol. It is very good especially for assessing low and medium powers, as it shows the normal architecture of the cell walls but has contracted protoplasm that displays the nucleus and an interesting texture. | ||||||||||
| Equipped with a Mathias arrow of cheap black cardboard I put on the stage my old test slide, focused on it and then I opened the filter tray of my condenser and slipped the arrow over it. I closed the tray and (of course) I obtained a beautiful dark background without any image trace of the arrow. | ||||||||||
| But manipulating the arrow back and forward and rotating it from side to side, I discovered the many ways in which it can be used to obtain dark field illumination, and oblique illumination in any degree, and even to simulate a Nomarski DIC microscope (for certain subjects, of course). | ||||||||||
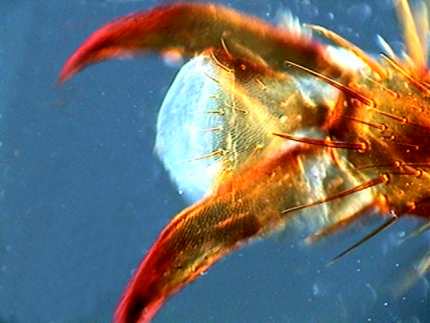
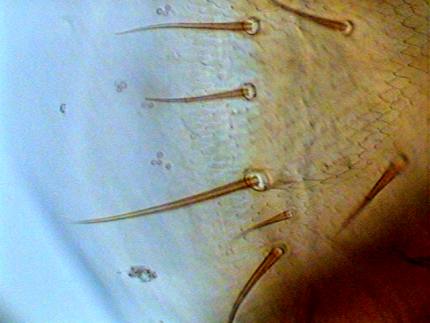
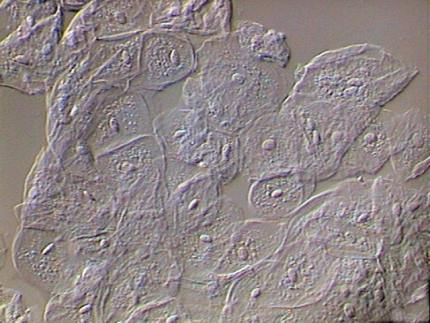
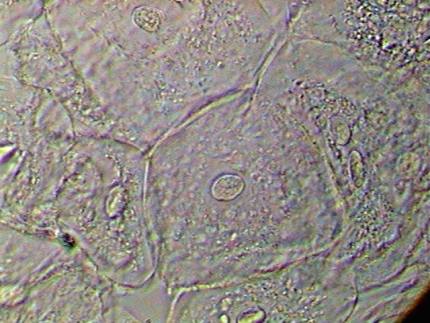
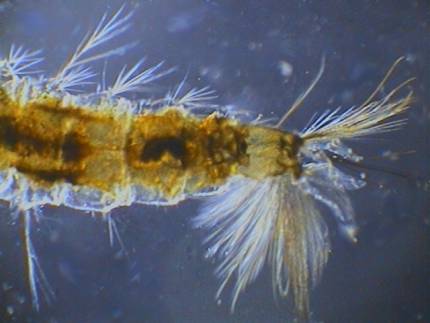
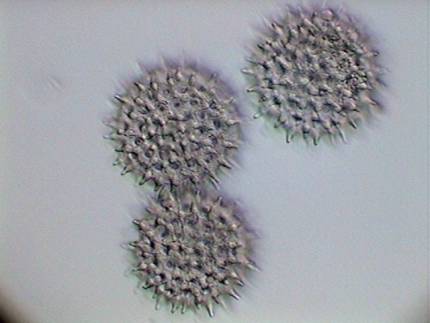
| I used four other test objects: the leg of a cockroach, a mosquito larvae, some pollen grains and my own cheek cells. | ||||||||||
| I expect that the examples I include here encourage many of you to try this device. You need one minute to make it, and can enjoy the results for hours. | ||||||||||
| I also expect that amateurs with objectives that fulfill the requirements of Mathias' device for 'Diffraction Contrast' try it and communicate the results. The author shows pictures that compare the behavior of a DIC microscope with his device. They are good enough to suggest the need for extensive testing. | ||||||||||
| The Erhard Mathias article can be read at www.schwaben.de/home/mathias/english.html | ||||||||||
| All pictures included in the Gallery were captured with my microscope with the 10, 40 or 100 power planachromatic objectives. The aperture diaphragm was totally open, and the illumination almost at full. No stains were used, and no other filters added. The only picture modified was the onion skin tinted yellow in PhotoPaint to imitate a DIC color filter. | ||||||||||
| GALLERY | ||||||||||
| ||||||||||
| The four onion skin pictures were taken with the 40x objective, from a preparation mounted in PVA-Glycerol. The fifth picture shows the nails of one cockroach (Periplaneta orientalis) leg with the 10x objective, mounted in PVA-Lactic acid. The sixth is a detail of the adhesive feature that allows the cockroach to climb the walls, with the 40x. The cheek cells shown in the next two images, were mounted in saline physiological solution; the first was taken with the 40x and the second with the 100x objective. The ninth picture is the tail of an Anopheles mosquito with the 4x, mounted in GLG, and the last one is from pollen grains of Ipomea purpurata, a blue bell-shaped flower, that is common in Durango, not stained and mounted in PVA-Glycerol, taken with the 40x. (Editor's note: the mounting techniques are described in the author's earlier series of articles.) |
Comments to the author, Walter Dioni , are welcomed.
Please report any Web problems or offer general comments to the Micscape Editor.
Micscape is the on-line monthly magazine of the Microscopy
UK web
site at Microscopy-UK