A
typical example.
Getting started
with a low power microscope
Tips
on how to use the 20x monocular microscope frequently recommended
as a first microscope for youngsters.
by David Walker, UK
|
Getting started
with a low power microscope by David Walker, UK |
Why
is it recommended? |
Where
can I buy one for me or as a gift? How
much do they cost?* USA: typically $80 - $100, e.g. at Edmund Scientific, Mel Sobel Microscope Store. This
microscope
may seem expensive compared with a toy microscope in high street
shops, but most models in toy shops especially those claiming high
mags will discourage a youngster not encourage them! Click
here for an extended explanation. |
This
page isn't intended to be read linearly;
just dip in to any tip of interest!
The
tips are written from the perspective of an adult supervising a youngster
or
older beginner using this type of microscope.
|
Getting
started. |
Top lighting.
|
Bottom
lighting.
|
|
How
to measure things.
|
How
to take photos.
|
What
to look at. Around
the home: Plants
/ 'bugs': Pond
life: Prepared
slides: what subjects are suitable. When a compound
microscope
|
Comments to the
author
David
Walker
are welcomed.
All images
by the author.
Thank you to my brother Ian for the loan of the Sony
P200 digicam.
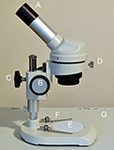
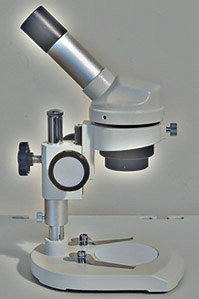
Getting started: A few tips. (Note: the total magnification of 20x is given by the magnification of the objective (2x) multiplied by that of the eyepiece, usually 10x.)
|
A: Eyepiece. A 10x eyepiece
is usually supplied with the 2x objective. A captive
screw enables eyepiece to be removed. Some dealers do offer 20x eyepieces
to increase total mag to 40x, but the optics
do not justify this if the author's example is typical; the images
are larger but reveal little extra detail. A better option is to reduce
the eyepiece to say 5x-7x to allow larger field views of eg
pond life. Most standard compound microscope eyepieces will suffice. |
|
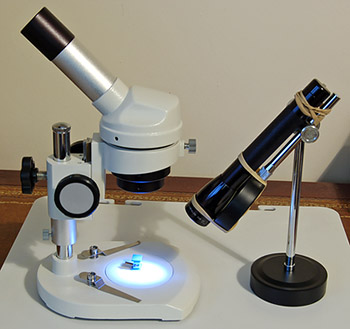 Top
lighting: Using the scope near a sunny window will be fine for many subjects.
But a bright lamp would be better and essential at night! Only the small field
of view (ca. 10 mm) needs illuminating so a desk lamp is overkill and can cause glare;
a better choice is to try a battery powered LED torch as they give a good
white light and are safe around youngsters. The batteries last a long time.
Top
lighting: Using the scope near a sunny window will be fine for many subjects.
But a bright lamp would be better and essential at night! Only the small field
of view (ca. 10 mm) needs illuminating so a desk lamp is overkill and can cause glare;
a better choice is to try a battery powered LED torch as they give a good
white light and are safe around youngsters. The batteries last a long time.
A homemade support can be made, or one of those cheap 'third hand' clamps from hobby shops is useful, or, as here, a stand for a magnifying glass. The torch is the popular MagLite design converted to LED as they last a lot longer on batteries than bulb supplied.
When studying a subject, experiment with the angle, height and direction of the lighting as different subjects often need different lighting to reveal extra detail and give modelling of the subject for photos.
 Bottom
lighting: Most microscope models of this design have a reversible black
and white disc in the base. Just try both sides for different subjects
and see which is preferred. Subjects that are transparent to some degree can
work best with a white base as some light is reflected back from the disc through
the subject.
Bottom
lighting: Most microscope models of this design have a reversible black
and white disc in the base. Just try both sides for different subjects
and see which is preferred. Subjects that are transparent to some degree can
work best with a white base as some light is reflected back from the disc through
the subject.
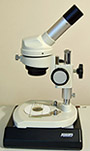
Another method for transparent subjects and in the author's view better, is to sit the scope on a light box for 35mm photographic slides; the model with viewing size ca. 5x4 inches is ideal. They provide an even white light that is excellent for this purpose. The model shown is sold by Jessops (UK) (model JESLB45) for Ł15* but most photo shops should sell them. They can run on batteries so enables use outdoors but indoors it's worth buying the low voltage power supply. *Update Dec. 2015. This style of light panel using a fluorescent lamp is now dated. The modern equivalents are the slimmer LED 5x4 inch panels and are better suited. See this Micscape article 'The versatile light panel'.
With a light box the opaque base disc is removed and can be replaced by a thick cardboard disc with ca 12 mm hole in to allow light through and to give support to e.g. glass slides (as shown right). Or even better a clear plastic disc made of e.g. Perspex.
The
low voltage supply*
makes it ideal for kids and if pond water is being splashed about. The base
can also work well as a first light source for a compound microscope which doesn't
have a mirror, e.g. with the popular Russian
LOMO Biolam stands.
*Note
that there are higher voltages generated inside the box for the older fluorescent
tube type panels so shouldn't be dismantled by youngsters and avoid liberal splashes of
water on it. The modern LED designs are safer.
How to take photos: Many of the digicams, webcams or mobile phones with compact lenses can often give a competent image by carefully holding the camera to the eyepiece with good lighting. Part of the fun of photography through a microscope is 'try it and see'. Try the different camera modes and experiment with various supports.
Quick
photo method:
Carefully focus microscope and compose subject. Experiment
with lighting for good modelling and try to get the lighting
as even as possible.
Try the camera on Autofocus and see if camera
focuses on projected image. If not retry with the Macro setting if available. The Sony
P200 autfocus worked well in Macro mode. If the camera has a fixed focus e.g. on
a mobile phone, you may need to refocus microscope as well as possible using
the preview screen if available on camera.
More experienced users with full
featured cameras may wish to do
a white balance on the light used and experiment with auto focus, fixed focus,
ISO, shutter and aperture if adjustable to find a set of conditions that
works best i.e. to give sharp, well lit, contrasty images!
Experiment with the optical zoom if present (not the digital zoom). Depending on subject, the full field of view with black circle or zoomed in can be tried (see image gallery). Note that for handheld work keeping the zoom at its minimum will minimise camera shake.
|
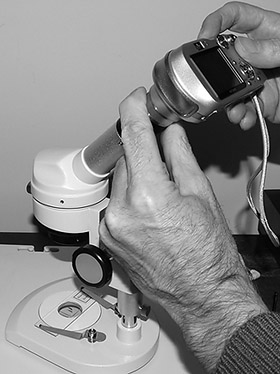
A simple handheld setup is shown right (seen without a light source for clarity). A Sony P200 7 Megapixel digicam with 3x optical zoom is shown. For models like this Sony with extending lenses, care needs to be taken, but the lens mount can be held lightly to align with the eyepiece which is almost the same width. With the lighting chosen keep an eye on what the camera shutter speed is being set if displayed. Handheld with care down to about 1/20th second is doable. If it has a manual mode it's best to choose the widest aperture to achieve the highest shutter speed. Note that for cameras with 'larger bore' lens designs this method will probably not work, i.e. only a tiny light spot may be seen even if optical zoom set at max and will be hard to align a wide lens with slim eyepiece. |
|
|
|
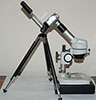
A sturdier set-up to avoid camera shake is shown left with bottom lighting. A slim tripod can be put to good use (a Velbon with telescopic legs is shown). The microscope needs to be focussed first and then the height and angle of tripod set so as the camera lens aligns well with eyepiece. Keeping a few mm or so gap between lens and eyepiece is advisable with cameras where the auto shut off extends the lens further before closing (the Sony P200 lens does). If a tripod can be dedicated to the scope (they're very cheap), the height and head angle can be set permanently allowing rapid use of a camera when needed.
|
|
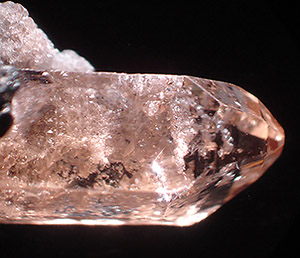
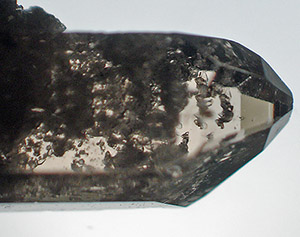
Try different lighting: The topaz crystal shown right demonstrates the value of trying different lighting. The upper one is seen with top lighting only with black disc below. It shows its true colour well and external growths. The same crystal lower right was photographed using bottom lighting only from a light box. It doesn't show its true colour well but shows better the internal features, whereas opaque external growths are black. Remember, there's no 'correct' lighting, try variations of lighting or in combination to see what is revealed for different types of subject. Lower mag eyepiece: Also used for the crystal was an old Baker 5x eyepiece instead of the supplied 10x, i.e. total mag was now 10x. The crystal was too large for 20x mag and has shallow depth of field. Reducing the mag showed all the crystal and gave more depth. |
|
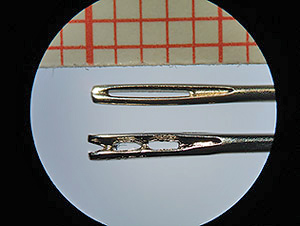 How
to measure things: Appreciating the size of a subject is a key concept
when using a microscope. At 20x a strip of graph
paper with 1 mm divisions placed in the field of view or a transparent rule can
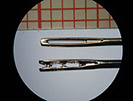
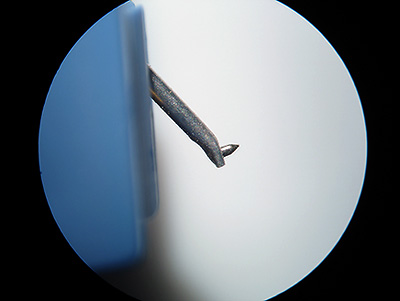
give an estimate of size both visually and when taking photos, as shown right. Here the eyes of both a normal and quick thread needle are compared.
How
to measure things: Appreciating the size of a subject is a key concept
when using a microscope. At 20x a strip of graph
paper with 1 mm divisions placed in the field of view or a transparent rule can
give an estimate of size both visually and when taking photos, as shown right. Here the eyes of both a normal and quick thread needle are compared.
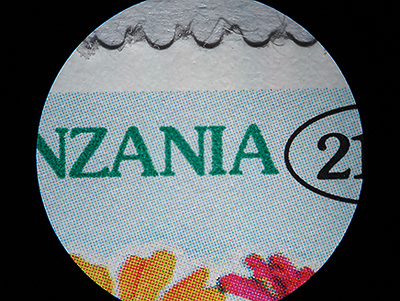
One advantage of a fixed 20x mag is that the field of view once measured is constant, typically 9 mm diameter. So a photo showing the full field can be used without a measuring strip to judge subject size.
This photo also shows the benefit of using both top and bottom lighting at the same time to give surface detail to opaque subjects.
When a compound microscope is needed. The 20x scope is fine for showing gross features of the type of subjects shown in the image gallery but struggles with fine detail in larger subjects and when the subject is just a few mm in size or smaller. Although the optics are competent for the price they aren't as crisp as those in more expensive low power microscopes. This is why using a higher mag eyepiece e.g. 20x to give a total mag of 40x on this sort of scope doesn't reveal much more. A cheap student compound microscope with optical mag of 40x will reveal more detail.
If from the outset the youngster or beginner of any age is interested in cellular detail of plant and animal specimens, or smaller pond critters, a student compound microscope would be better. A compound microscope does require some sample preparation and a wide range of prepared slides are available to get started. (See this article for an extended explanation of a compound microscope use.)
Here's a comparison between the 20x microscope and a student compound microscope at approx. lowest power of 35x. (Camera on a tripod to avoid camera shake).
|
|
|
Image
gallery: These were all taken with the 20x
microscope described, using
a handheld Sony P200 digicam,
Autofocus, shutter 1/20th - 1/50th sec. Images with
black border - the optical zoom was minimum, others had variable zoom settings
and some cropping.
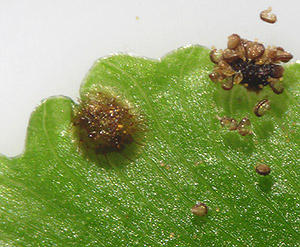
Around the home and garden - a good place to start!
|
|
|
|
|
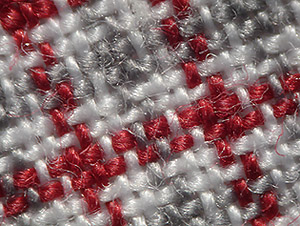
The appeal of microscopes is that the ordinary can offer plenty of interest when magnified. |
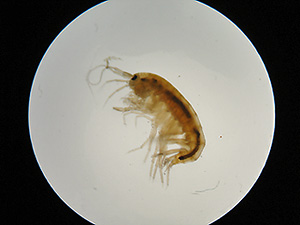
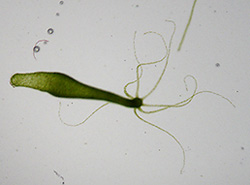
Plants, 'bugs', pond life
|
|
|
|
You can
spend a lifetime studying what nature reveals on the microscopic
scale and why for many it does become a lifetime's hobby. |
|
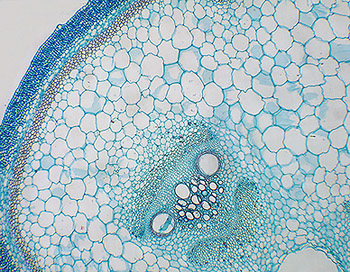
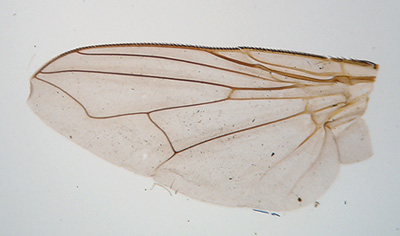
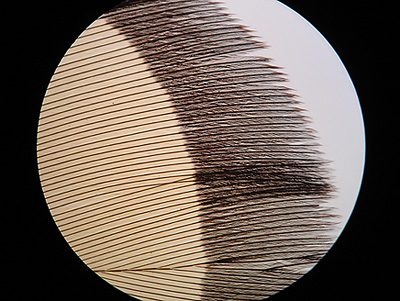
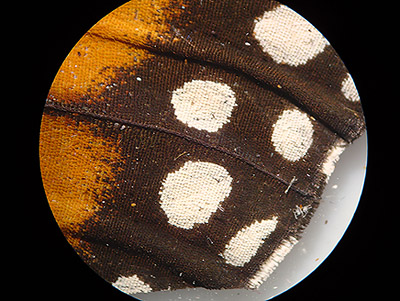
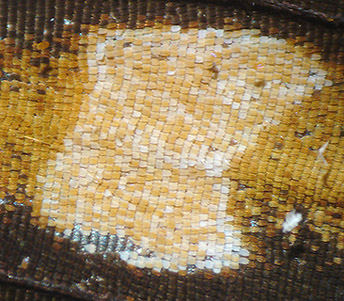
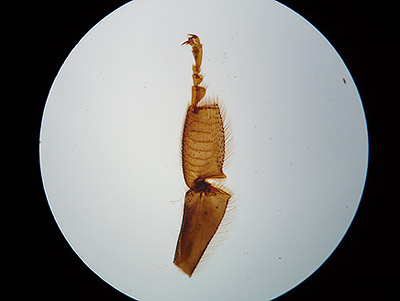
Prepared slides
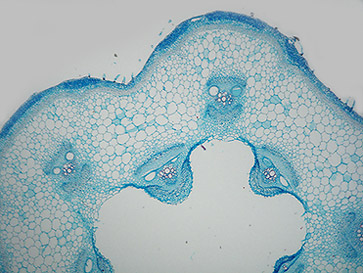
Prepared slides are primarily intended for study with a compound microscope typically at mags of 40x + , but many subjects can be studied at 20x to appreciate overall structure and can complement compound microscope studies. The types of slides that can work well is whole insects and larger insect parts, some animal parts like feathers. Many plant sections seen at 20x can show the general structure and larger cells but they really need higher mags to study in detail. Histology subjects such as animal organs and tissues arguably aren't best suited for the beginner; 20x is too low a mag for many histology subjects and a compound microscope is needed to reveal animal cell detail and requires more guidance on interpreting what is seen.
|
|
|
|
|
|
|
|
|
Published in the December 2005 edition of Micscape.
Please report any Web problems or offer general comments to the Micscape Editor .
Micscape is the on-line monthly magazine of the Microscopy UK web site at Microscopy-UK
© Onview.net Ltd, Microscopy-UK, and all contributors 1995
onwards. All rights reserved.
Main site is
at www.microscopy-uk.org.uk
with full mirror
at www.microscopy-uk.net
.