Diaphragm and Condenser
|
Back to Basics by Howard Webb (St. Louis, MO, USA) |
While an understanding of optics is useful, much of the mathematics and details are more important to people designing optical systems (the microscope), than those who use existing systems. Most of us fall into this latter category. We obtain a microscope with existing optics, and only occasionally are we even likely to acquire a new objective or eyepiece. For us, the issue is how to maximize the capabilities of what we have through good technique. I will skip the theory, and present some simple 'how to' instructions, and show the difference these make. For those who would like more detail of theory, I include several excellent references at the end of this article. Exploring these web sites and tracing their bibliographies will take you as detailed as you care to go.
I don't want to denegrate the newest optics, but those of us who are amateurs shouldn't make too much of them either. When we understand their intent, a quality $50 achromatic objective can meet our needs, and we don't need a $3,000 apochromatic. Most of my work (with daphnia) is 40x to 100x, with occasionally 400x. I am not doing fluoresence of inner cell structures. If we are not doing cutting edge research, we don't need cutting edge equipment. Look at the winning entries in the photo-microscopy contests, there are images from high-end equipment: the fluoresence, DIC and polarized images, but there are also common objects at low magnification.
The biggest issue is quality, not cost. However, a cheap 'department store' microscope is no bargain at any cost, you will not get quality optics. By matching our interests to our equipment we can avoid a lot of issues and expense. Know your intentions and limits. If we are willing to put up with a monocular scope, and used equipment, there are some wonderful microscopes available, particularly from schools and businesses trading in old equipment for newer technology. Check microscope dealers for used equipment, or possibly on-line auction sites.
Equally important to the optics is a condenser. The formation of the light before and as it passes through the specimen and enters the objective can be as important as how the light is handled by the objective and eyepiece. I think the sales literature is thin on condensers because they are relatively simple compared to objectives, but the condenser is the one place where you have a lot of control and manipulation of the light (and subsequently your image).
The rest of this article is an exploration of what changes to the condenser can do to an image. I want to take one slide, and show the effects of a few simple changes.
Ernst Abbe (1840-1905) worked with Karl Zeiss, and established much of the theory behind good microscope optics. In 1870 he developed the two lens condenser. The purpose of a condenser is to create a uniform cone of light converging at the same plane where the subject is in focus. This is important, if you want to know why, you need to understand the science of light, which is covered in the articles I reference. The ability to optimise the condenser's cone of light to that of the objective in use is also important, thus most condensers come with a diaphragm.
My microscope came with a nice Abbe condenser, I didn't know much about it at the time I got the microscope, but I have come to appreciate how good it is (if treated right). If you don't have one, seriously consider getting one.|
|
|
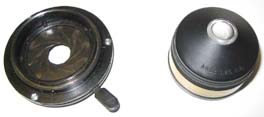
Diaphragm and Condenser |
The lever on the side of the diaphragm is used to control the cone of light.
|
|
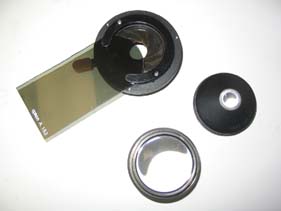
Bottom of Diaphragm with filter holder. Condenser in two parts |
If you look closely at the neutral density filter, you will realize it was a square Cokin camera filter, which I cut to fit the microscope.

|
| Diaphragm and Condenser mounted on the microscope, with the light (black box). |
This is the complete assembly. The diaphragm and condenser screw together over the bracket, which also holds the light. The condenser then slides into the mounting ring (held in place by a small set-screw knob). This whole assembly can be raised and lowered on a rack & pinion via the knob to the right of the picture.
Achieving Kohler illumination with an Abbe condenser is quite straight-forward and simple, assuming the lamp and bulb has been correctly set-up according to the manufacturer's instructions.
|
| Diaphragm closed down and in focus. |
|
| Focus on the frosted glass of the light box |
|
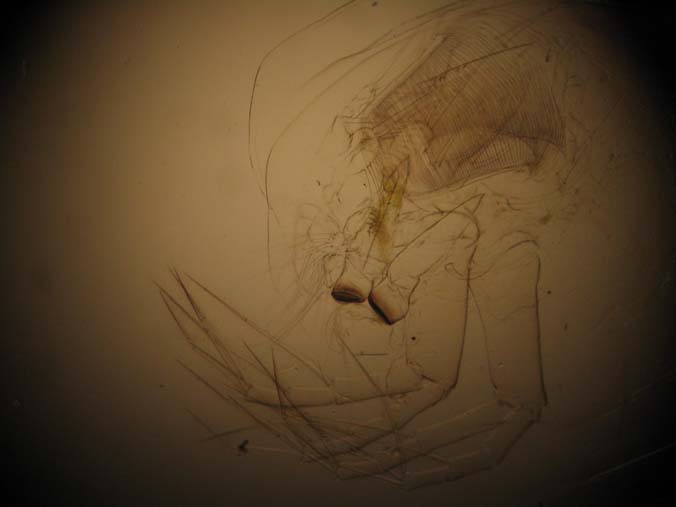
| 40x with condenser vignetting the image |

|
| Condenser with one lens removed |
|
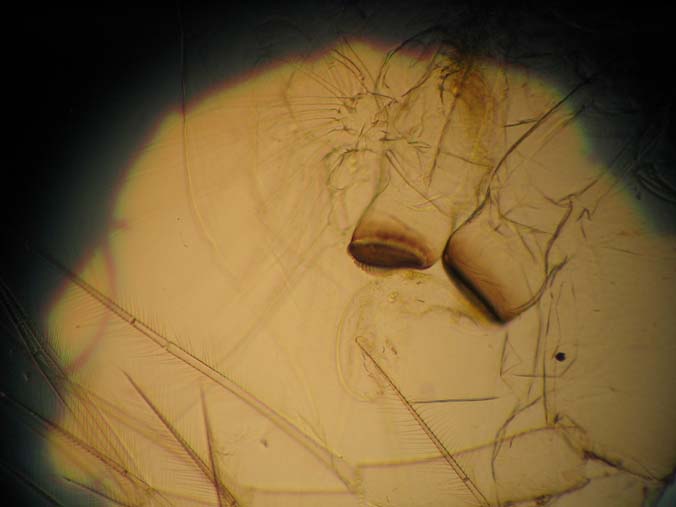
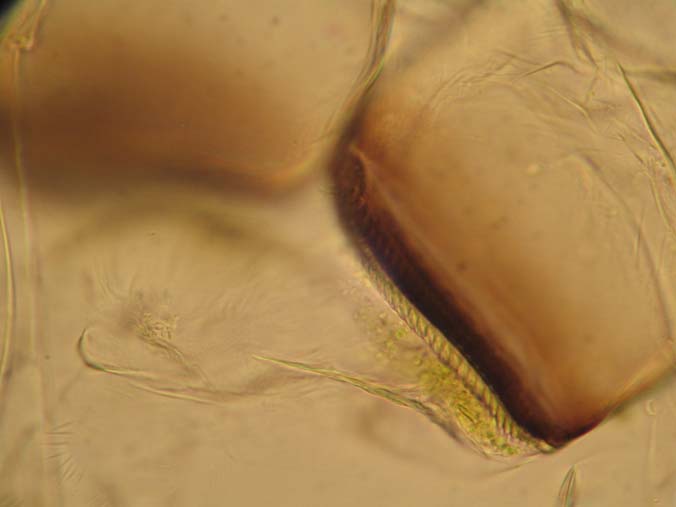
| 400x close up of jaw surface |
|
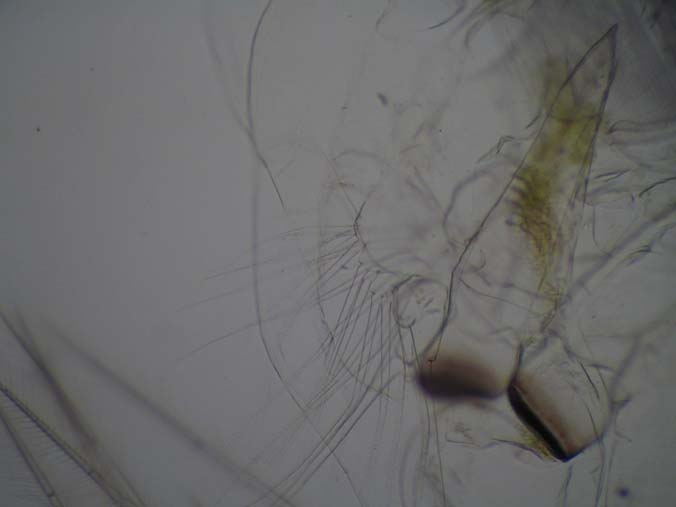
| White balance adjustment |
|
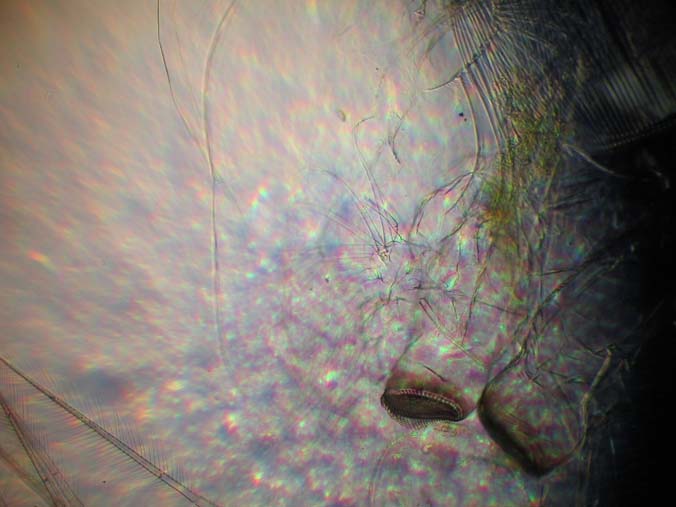
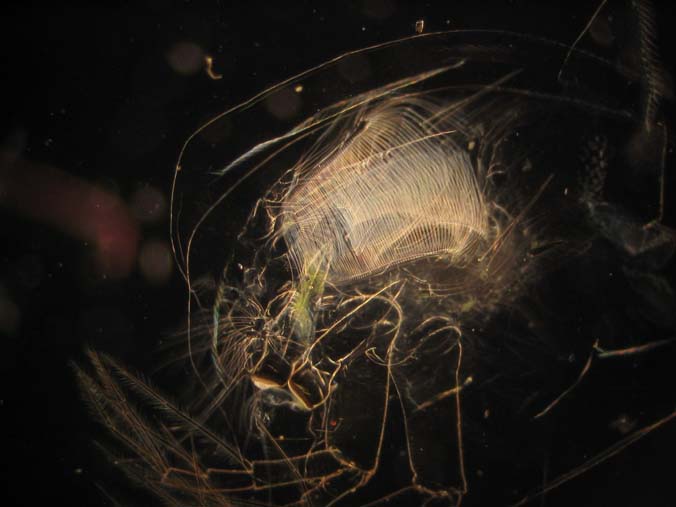
| 40x Dark Field |
I started to use some old slides for this article, but swapped out a new slide at the last minute (for no particular reason). The slides I had considered using were made about four months ago. While relatively short term (relative to how long slides are often kept), it has provided the opportunity to observe how well PVA-G mountant holds up. So far, the slides show little change from when they were made. There is no deterioration of the speciments, and no noticable change of colors. The only evident distortions (due to osmotic pressure) are to the volvox and stentors, and this was evident within a day or two of when the slides were created. Unlike when I used jellied glycerin, I do not seal the edges of the coverslip, yet there is no indication of drying out or shrinkage of the mountant. Though (or because) the slides are kept in boxes, there was a haze or film on them when I went to take these photographs. I suspect this may be caused by some evaporation and condensation as the slides 'set up'. This is not a significant problem, as the film easily cleaned off of the slides. I am glad that I gave PVA-G a try, and will continue to use it as my primary mountant.
An alternative to PVA mountant formula has also been suggested, which contains lactic acid. I have yet to try it, though do have one suggestion. If you have difficulty finding lactic acid, try a wine and beer making supply shop. Lactic acid is used by these folks to adjust pH, and you can get several ounces for only a few dollars (USD). This is a much easier source for small quantities than a chemical or scientific supply company.
Slide Used: Shed exo-skeleton of a Daphnia magna (from my cultures). The darkest object is part of the grinding jaw. When daphnia shed, the exo-skeleton usually comes apart in two pieces. What you do not see in these images is this other part, the 'head shield'. You are seeing the main body, antenna and legs.
Microscope: Bausch & Lomb monocular, 10x ocular, 4x, 10x and 40x objectives.
Camera: Canon A70
Software: Photoshop Elements
Comments to the author
Howard
Webb are welcomed.
Published in the February 2006 edition of Micscape Magazine.
Please report any Web problems or offer general
comments to the
Micscape Editor,
via the contact on current Micscape
Index.
Micscape is the on-line monthly magazine of the
Microscopy UK web
site at
http://www.microscopy-uk.org.uk/