As shown in several articles in Micscape Magazine, taking measurements of microscopic subjects is a wish or a need of many amateurs.And, as there are a lot of so-called amateurs working at many levels, there must be different accuracy requisites for the measuring methods they use. Nowadays, we have a lot of measuring techniques available.
1) For those of you that have a camera connecting your microscope and computer, you could use the delightfully simple method of direct measurements with a ruler on the computer screen as described by Jean-Marie Cavanihac in his Micscape (May 2000) article for novices, Introduction to quantitative microscopy. And also you could see there (in the Editor's Notes), that Dave Walker proposed to use as a standard of reference the versatile eyepiece graticule, as an alternative to a coverglass thickness.
2) In their old but useful book on protozoa (1949) the Jahn’s (T.L. and F.F) proposed a crude method that needs nothing but the microscope and your eyes: use a piece of millimeter graph paper and estimate visually (with the greatest care) the diameter of the field of view. Below is a scanned reproduction of his fig.4. His 10x objective had a field of view of about 1600 µm.
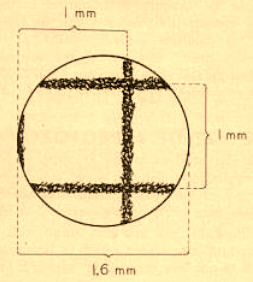
Figure 1.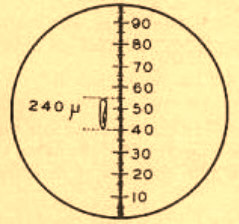
Figure 2.Using this method for the lowest power objective, you could estimate the diameter of the field of view of your higher power objectives with a simple “rule of three”. If your next power is 43x, they suggest this calculation: 1600/(43/10) = 372. (The same is valid if you calculate for your 3 or 4x.)
With this method, they remark that you can estimate with good approximation a crude value for the lengths of subjects that span as little as ca. 1/5th of the field of view. (Say 250-300 µm for the 10x and 70-80 µm for the 43x.)
3) Not so long ago the only method to make an educated guess of the dimensions of a microscopical subject was with the combination of stage micrometer and eyepiece micrometer. The latter is a disc of glass with an engraved scale, normally divided into 100 parts, whose absolute value is immaterial. The dimensions of the stage micrometer on the contrary must be accurately known. It is a scale of one or two millimeters in which each millimeter is divided into 100 parts. Any division measures 10 µm. (You can imagine the heroic technical feat of making such accurate scales in the first years of microscopy!)
You put the stage micrometer under the objective, the eyepiece micrometer “in” the measuring ocular, and by looking through the eyepiece while focusing, superimpose the two scales. Then note the number of stage divisions that accurately coincide with some divisions of the eyepiece scale. Thus a micrometer equivalent for a division of your eyepiece micrometer can be determined. After that the eyepiece micrometer can be used to measure every subject placed in the field of view and under the engraved rule. The method is optimal with immobile subjects like histological sections, whole mounts and the like. It was the professional method of measuring till now.
Besides all the pretensions of accuracy, this professional method, if not refined with some “statistics”, gives only a very educated guess of the real dimensions of the subject. Making many measurements of the same thing (leaving aside simple subjects with very clear and sharp reference points) gives you different values. Only slightly different values, but different. You must calculate the means and the standard deviations and so on, if you wish to be precise (your scientific pocket calculator, or the Windows scientific calculator in your screen, can do that for you). This professional method gives measurements that normally are accurate to less than a 1%.
All the non-professional methods, of course, can benefit from this technical refinement which certainly doesn't make them more accurate, but does define their precision, which is almost as important, if not more important.
3) The Jahn’s adapted the above method to the budget of a student or amateur, by leaving aside the stage micrometer, which they replaced with millimeter graph paper, to obtain a crude estimation of the width of the field of view to obtain a micrometer equivalent. They assumed you could get an eyepiece micrometer with a scale that ran the full length of the field of view and which is divided into 100 parts. If your field of view diameter amounts to 1600 µm, any division in the micrometer has a value of 16 µm; if it amounts to 372, any division is 3.72, and so on. But really it is a problem to do accurate measurements by this method, if you don't have this specific type of eyepiece micrometer or something like it.
4) Now, Chitchai Chantangsi gave us a very elegant method adapted to the new era of photographic cameras, not necessarily digital, but with the aid of a scanner, computer image processor and by working on the desk with the printed image. There is no need to summarize his work. It is very fresh.
5) Everybody who reads Micscape Magazine has a computer. Obviously. Most of them certainly have a microscope. Many surely have tried, or hopes to try, a webcam or a digital camera for capturing microscopic images. With this in mind, in the rest of this article I have tried to put another method into the hands of amateurs, and discuss its basis.
The best and most professional method for microscopic measurements requires the possession of a stage micrometer, and an eyepiece micrometer, as described above.
As I have the stage micrometer but not the one for the eyepiece, which inverts the Jahn’s premise, I present my approximation below.
First I measured with care the diameter of the field of view of every objective. (Obviously I was not confident of the manufacturer's declared values and searched for discrepancies). To my surprise my numbers (with very little rounding) confirm with great accuracy the values engraved on the body of each objective. You could see from Table 1 that the 40x objective for example is exactly 10 times more powerful than the 4x and 2.5 times the 10x.
Table 1
Measured field of view of the author's four DIN
planachromatic objectives.
10x eyepiece.Objective 4 X
Objective 10 X
Objective 40 X
Objective 100 X4450 microns
1780 microns
445 microns
178 micronsThis was a promising start. Now I put into action the webcam I possess, linked to the microscope, and took a photo of the scale at a size of 640 x 480 pixels with each of the objectives. As the scale is mounted vertically on the slide I could only measure the smaller dimension of the photographic field, which was a suitable portion of the whole field of view. But for the sake of completeness I calculate a value for the other dimension. (The figures are in Table 2 and the images are figs. 3-6 below).
Table 2
Actual dimensions (in microns) of an image
captured at 640 x 480 pixelsObjective 4 X
Objective 10 X
Objective 40 X
Objective 100 X3400 x 2550
1333 x 1000
340 x 255
133 x 100
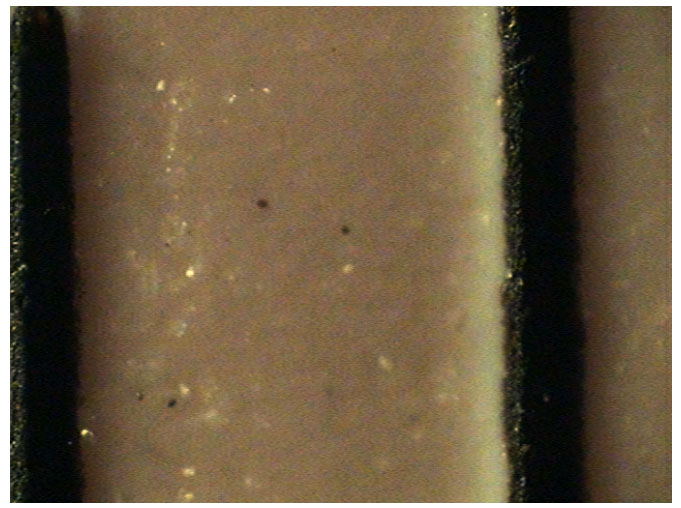
Image captures of a micrometer scale using the stated objective. Click on each image to see the original captures at an interpolated 640 x 480 pixels.
(The real resolution of the sensor is 320 x 240.)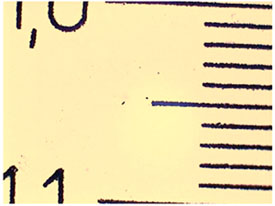
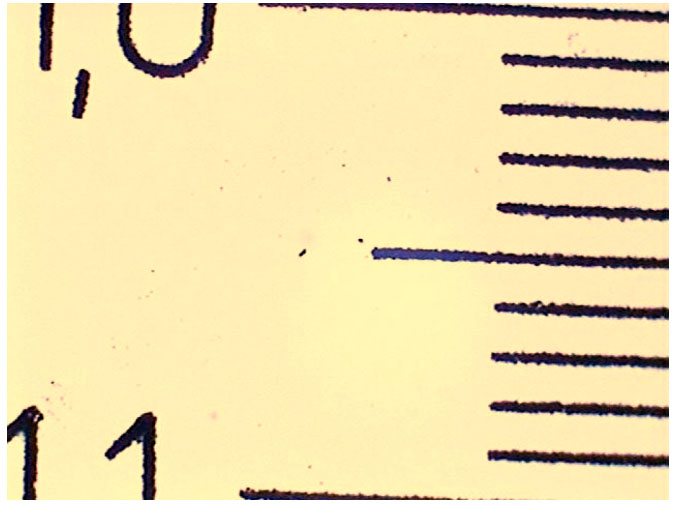
Figure 3. 100X
Figure 4. 40X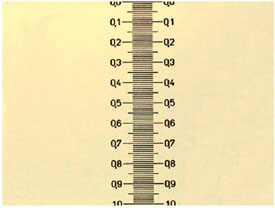
Figure 5. 10X
Figure 6. 4X
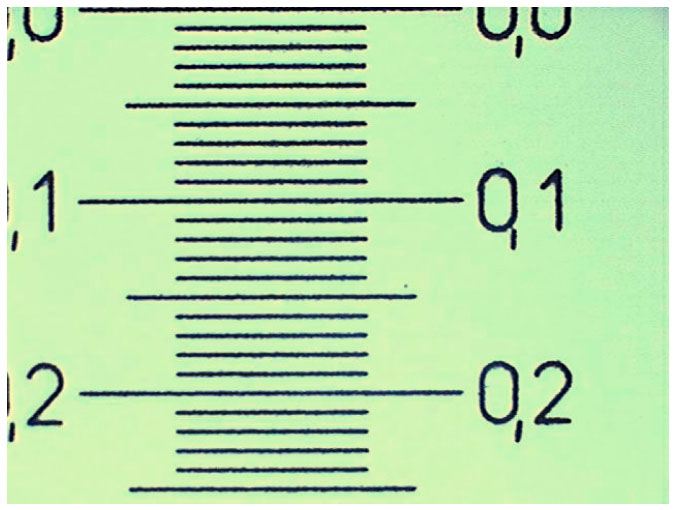
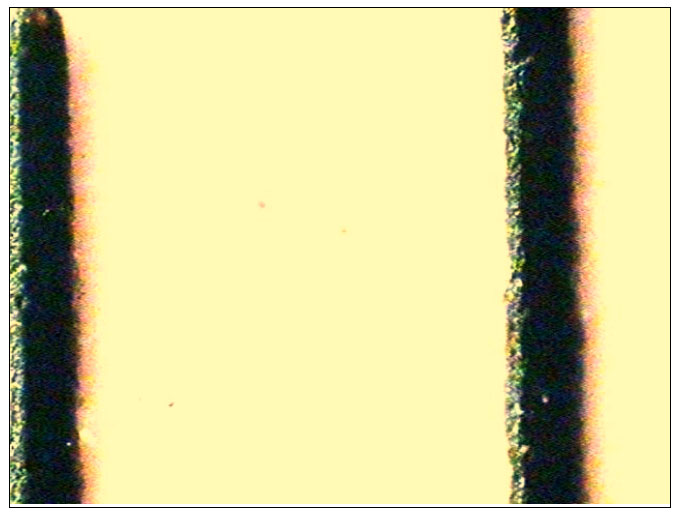
Figure 7.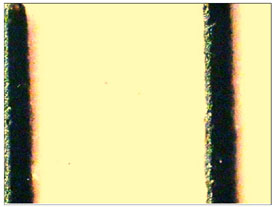
Figure 8.Figure 7. An architect's rule was used to measure the width of the field of view.
On my screen this image (inserted into a Microsoft Word document) is 176 mm wide. But printed from Corel Photopaint as a landscape page it is exactly 169 mm. Printed as a portrait page from this document in my HP DeskJet it is 120 mm.Figure 8. Same image as fig. 7, but with enhanced contrast
The quality of the image I took with the 4x objective is disappointing. The quality depends on the resolution of the camera which is 320 x 240 pixels, at 72 ppi. Images strictly for the web! The 640 x 480 image I use as my standard capture size, is automatically created by the capture program by interpolation of pixels. As in microscopy, when you use a more powerful eyepiece, this magnification is 'empty'; it doesn't reveal new details in the subject. It only makes them more easily seen. As the 4x planachromatic objective has an NA of 0.10 its theoretical resolution in green light is 2.75 µm. (A very good review of objective resolution with tables is on the Molecular Expressions web site). Viewing through the eyepiece, the lines of the scale are, of course, clearly separated at 10 micron intervals. But…
A pixel is an all or nothing device; it does not contain any extra detail, just a shade that depends on the depth of colour or a grey scale which your hardware defines. So in a 320 pixel line there are 320 points that can be activated. The microscope image that must be registered by the 320 pixels has 3400 microns (see Table 2). Thus every pixel accounts for 10.6 microns and this is the minimum that my poor camera, with its fixed geometry, can resolve. Thus my camera has a resolving power 3.9 times worse than the microscope objective. So I cannot make direct use of the printed 4x scale. (If you want to resolve with precision the image of your micrometer scale at 4x, it is clear that you need a sensor with at least four times the resolution of the author's). If the digital camera (without its objective lens) is to behave like the normal photographic camera (I am very ignorant at this point) there is another possible solution for those that have the camera linked to the microscope through an extension tube: if you make the tube longer, the field of view impinging on the sensor could be reduced. If you could reduce the field to only 960 µm this gives a relationship between microns and pixels of only 3.00 µm per pixel (960/320). The ten micron divisions would resolve very well the 10 µm as it must now cover three full pixels. But now, at least in normal photography implies a much longer exposure time, and you must be able to control this very accurately. Also you only see in your camera a portion of the original image view through the eyepiece, and if you want to see in your photo what you see in your microscope you must resort to the mosaic method that J-M. Cavanihac has explained here. There is nothing obtained for free really!)
But, coming back to my camera, I can capture more or less clear images of the micrometer scale using the 10x, 40x, and 100x objectives. All of them of course four times worse resolution than that for visual observation.
To print the scales, I recommend using the 640 x 480 pixel image. To calculate the size of the printed version:
640 pixels / 72 pixels (camera and screen resolution) = 8.88 inches (22.58 cm) and 480 gives 6.67 inches (16.93 cm). If you print with the printer resolution set at any dpi, this is the size of your printed document. If you set your printer at a low dpi you obtain a coarse texture, at higher ones the print would be more uniform and soft textured. The printed details remain the same, those that were registered by your camera, and also the printed size.
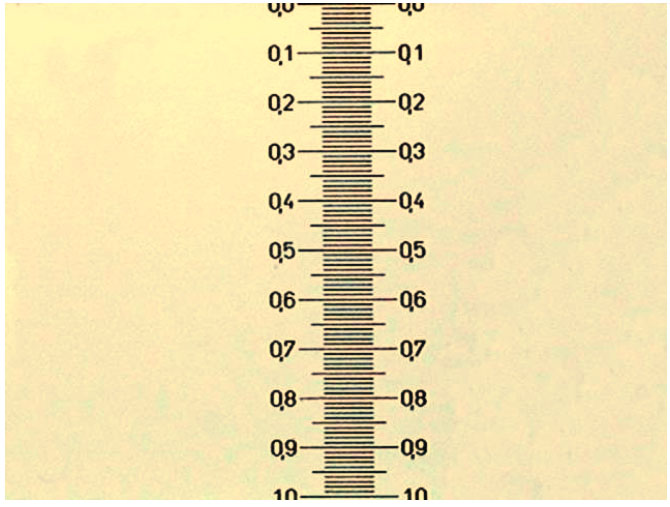
Try to print an image at 640 x 480 pixels and you would find that the results are really similar to these figures. So at 10x, 16.93 cm are equivalent to one thousand microns (see Table 2 above). It is then easy to convert to a microns / mm equivalent. (1000/169.3 = 5.91, say 5.9)
I take an image of whatever I wish with the 10x, at 640 x 480 pixels, print it, and with my good metallic ruler I take the measurements I want. A simple multiplication of mm x 5.9 gives the size in microns. I leave you to calculate the equivalents for the other objectives.
A tip: for the 4x I resort to the well proved relation of powers (see the two tables) and obtain their equivalent dividing by ten the 40x equivalent.By trying this method with your own equipment you would be rewarded with a very accurate method of measuring your critters. An equivalent method, using a “camera lucida” to create the images, was in use for a long time, and has been used ‘till now by professionals. Images from digital cameras (even bad cameras) are really better material than the hand made camera lucida drawings for measurement. See here an article by Roy Winsby on the use of the “camera lucida”.
6) To do your own experiments requires that you have, besides your microscope, a web cam, a printer and a stage micrometer. The first three surely you have. About the stage micrometer, if you are an amateur, and don't want to invest in one, at least for a time, remember the Jahn’s, and put under your 10x objective a millimeter graph paper. Or a transparent finely engraved rule. Or better still, a well lit opaque architects rule (there are some that are divided to the 0.5 mm). See D. Walker setup for “top lighting” here. Of course, if you are fortunate enough and have an eyepiece graticule that is marked in known units (some are exactly 1 cm long, with 0.1 or 0.2 mm subdivisions), you can use it as a stage micrometer. Then take your image and print it. Did you realize that you have a decisive and beautiful advantage over the Jahn’s method? Once the print is made, you can put your mm rule to work and figure, with great precision, the real width of your camera's field of view, this is much better than a guess by looking down the eyepiece. It is almost like you have a micrometer eyepiece. A lapse of 52 years (since the Jahn's book) makes the difference.
Here are the results from my own trials. The printed one mm scale can be measured to be more or less 169 mm wide. I have really estimated several values, between 168 and 172, most of them in the 170 mm value (see image above, click it to view the original version, print it). Compare this with the 169.3 mm we know that a millimeter corresponds to. And calculate the equivalent: 1000 (microns/mm)/170 = 5.88. Is it not an amazing result?… and obtained without the expensive stage micrometer.
Now: did you appreciate that you can measure microscopic objects like a pro?
If you also want to add a reference scale, you must resort to an electronic image processor, as Chantangsi suggests. I use a different method (with similar results) but this is a very long article. If you have the image processor tools you can probably manage to do your reference scales.
Incidentally, and as a last remark, the augmentation of every objective, with the ocular you use (10 x in my case) and with the standard length of the tube, is the respective product of objective power by the eyepiece power. (for the 40x it is 400x).
But the camera can exhibit a different behavior. See Table 2, where 1000 microns (1 mm) of the 480 pixel image side is equivalent to 16.93 cm. That amounts to 169.3 mm. The visual power is 10 x 10 = 100, but the camera at this size gives an image of 169.3 powers. With all the errors involved you can speak of 170 powers. Verify your own figures.
One last remark: if you now trust in the method sketched out above, and think a little, you can see that if you had your electronic (or film derived) photo of the rule (be it the stage micrometer or the architect's rule), it doesn't matter were you make the measurement. On the screen, on the printer, at full pixel size (22.6 x 16.9 cm) or a derived image at a reduced size, you always have the power to measure your mm image and derive a microns per mm coefficient, with which to measure the details of a microscopic subject image printed at the very same scale. Definitely the desk method is better for me than the screen one, but… perhaps you don't have a printer?
Everyone of you that has a better webcam, or a digital megapixel camera can do a much better job than I could. Let me know, and publish your results for the benefit of others. And don't forget that “statistics”, “means”, and “standard deviations” are words that must come into our daily usage, the manuals of your hand calculators surely explain all this stuff, and after a little reading and thinking you could be a much better informed amateur. Always make more than one measurement of the same thing ….
Comments by e-mail are welcomed to Walter Dioni.
BIBLIOGRAPHY
Jahn, Th.L. & Jahn, F.F., 1949.- How to know the Protozoa. 234 pgs, 394 figs. Wm. C. Brown Co. Publishers. Dubuque, Iowa.
Cavanihac, J-M.- Introduction to quantitative microscopy
Cavanihac, J-M.- Microscopie quantitative
Cavanihac, J-M.- Improving picture quality (1 and 2)
Chantangsi, Chitchai.- A measuring method for microscopic organisms
Roy Winsby.- Drawing through the microscope
Walker, David.- Simple top lighting
Molecular Expressions.- page on Numerical Aperture