USE of the LOGITECH QUICKCAM PRO 9000
for photomicrography
History of a near-failure, or a semi-success
Walter Dioni
Cancún, México
CONSUMER CAMERAS AND PHOTOMICROGRAPY
Many
microscopists commonly use very successfully "consumer cameras (Nikon, Olympus,
Sony, etc) without direct screen monitoring capacity, or USB connection to
computer (except for downloading images). Microscopists generally focus with the
electronic viewfinder or LCD preview panel of the camera, for that a camera with large display is
needed, or, as in the great installation of Charles Krebs, they parfocalize
the camera so that the image can be captured while observing directly with the
binocular microscope. The valuable technical guidelines, methods, and results, of
Krebs MUST be read at
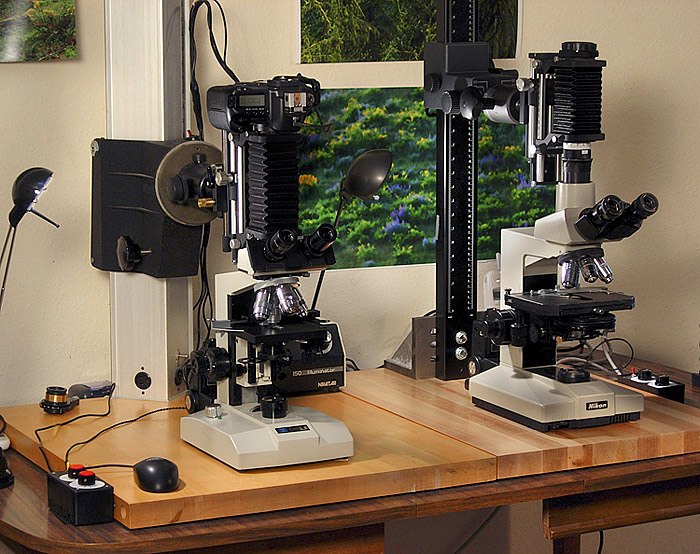
An
image provided by Charles Krebs of his impeccable facilities
Those who
read his articles would be divided into two groups:
1) those who can acquire the necessary
equipment (high quality optics for their microscopes, cameras with the desired
sensor size, with adequate number of photodiodes to produce images of a high
number of pixels, relay lenses carefully calculated, and professional adaptors,
etc.) which can therefore effectively use the quality of their facilities
in their photomicrographs, and ...
2) those that do not, and who,
forced by the circumstances, must try to adapt their cameras, to their personal
microscopes, with the sensor size and pixel size they have, to obtain the best possible images.
Of course
it is only for the latter that these lines are written.
In my case, I wish to
maintain the advantages of the Motic DC-3, although surpassing the capture size
limitations. It is clear that my choice of camera will depend, fundamentally, on
whether it is commandable by the computer.
If you want to monitor the image on the
screen, making there a first adjustment, and capture it with a click of the
"mouse", but to also have the option to easily capture video of moving
subjects, this limits the choices to webcams, or ... to certain Canon cameras.
(A70, A75, ...., A520, A540, A620, etc) that have included software (
"Remote Capture") for monitoring on-screen, mouse capture, and image download to your
computer via a USB-2 port. With their 10 Mpx pictures and easy connection to a
computer, the A620 Camera has won the prestige of being recommended by Zeiss as
a good photomicrography camera.
Note: Currently, software
is offered
online for "remote capture" (PSRemote, eg.) which can be adapted to
various other cameras. But I have not seen any microscopist who describes
its use. The remote capture eliminates any mechanical maneuver for shutter release
of the camera and thus avoids most of the vibrations that affect the quality of
the image. (the program costs $95.oo)
The Canon Powershot A70 and A540 are used by Howard Webb, in his contributions to MICSCAPE. The Canon S50 (which also allows remote capture) is used by Michel Verolet from the French forum MIKROSCOPIA, who has obtained remarkable rotifer pictures using it on the eyepiece. His images are available in the Encyclopedia of the Forum, after a simple registration. Thanks to their kindness many of his images can also be seen in MICSCAPE, by reviewing the following works
http://www.microscopy-uk.org.uk/mag/artnov08/wd-rotifer3.html
http://www.microscopy-uk.org.uk/mag/artoct08/wd-rotifer2a.html
Post processing of the images.
Of course it is very difficult whatever the camera used, to create an image
that is flawless and perfect. So not only is it important to choose the
recording camera, but also the software used to post-process the
images.
Motic program "Images 2000, v. 1.3" which is the one I used, or Images Plus 2.0 which I use now, only works
with Motic cameras, for capturing snapshots and video. Also they support
the minimal processing (brightness, contrast, color, lighting, sharpness) and the
easy addition of text, and lines. They also allow amalgamation** of photos, which
is helpful in cleaning up stray shadows in the image.
The Images 2000 allows the taking
of longitudinal and surface measurements, after a simple calibration. Additionally
Images Plus also measures angles.
(And counts particles?)
I do not extend the discussion nor add illustrations on this
subject because my information differs only in details with those provided by D.
Walker to whose article I refer again, and whose magnificent illustration describes
the program in detail.
I own
these, with which I
perform the following functions:
a. Inclusion of scales (CbZP, PhotoPaint, Photoshop)
b. Take measurements on the image (idem)
c. ** Amalgamation of images, for cleaning backgrounds (Motic, PhotoPaint,
Photoshop)
d. Stacks merging to increase depth of focus (CbZP)
e. Processing for adjusting light, contrast, color, sharpness, noise removal
(PhotoShop, ACDSee, NetImage) (in some cases I use the HDR facility of
PhotoShop)
f. Elimination of moiré (especially in large reductions in size),
PhotoShop, PhotoPaint
g. To trim in various proportions
(ACDSee, Photoshop, PhotoPaint)
h. Cleaning blurring or replacing undesirable backgrounds (PhotoPaint,
PhotoShop)
i. Combining mosaics (Photo Paint, PhotoShop)
j. Adjustment of the edge of mosaic images with the cloner (ACDSee,
PhotoPaint, PhotoShop)
k. Resizing with Lanczos for enlarging step by step (ACDSee)
l. Ditto for size reduction (ACDSee)
m. Including lines, text and drawings on the image, with control of size and
color (PhotoShop, PhotoPaint), ACDSee (text))
n. Overlapping grids over the images for drawing from the screen (PhotoPaint,
PhotoShop). An important, even if most of the time forgotten, feature.
o. Editing videos. Extraction of
selected frames (Avidemux)
I have an ample supply of programs because my grandson is specialized in the
use and sharing of software. But whoever does not have that facility could use the ACDSee
system that I recommend enthusiastically, and three other free programs:
PaintNet, CombineZ and NetImage demo.
DOES THE LOGITECH 9000 HAVE THE DESIRED
QUALITY?
The Logitech as a webcam, or as a
normal camera (1.3, 2.0, 3.0, 4.0, 8.0 Mpx).
The following is a
preliminary test I made to decide whether the camera complied with the manufacturers
promises of image quality. There are some comments on this subject posted to
the net, but none very critical, because almost all refer to the normal use as
a webcam for live video, a task for which their behavior is outstanding.
The pictures were
taken by successively graduating the camera for each reported capture size. Then I
cut a "manageable" rectangle of
a similar area from each image to be compared here.
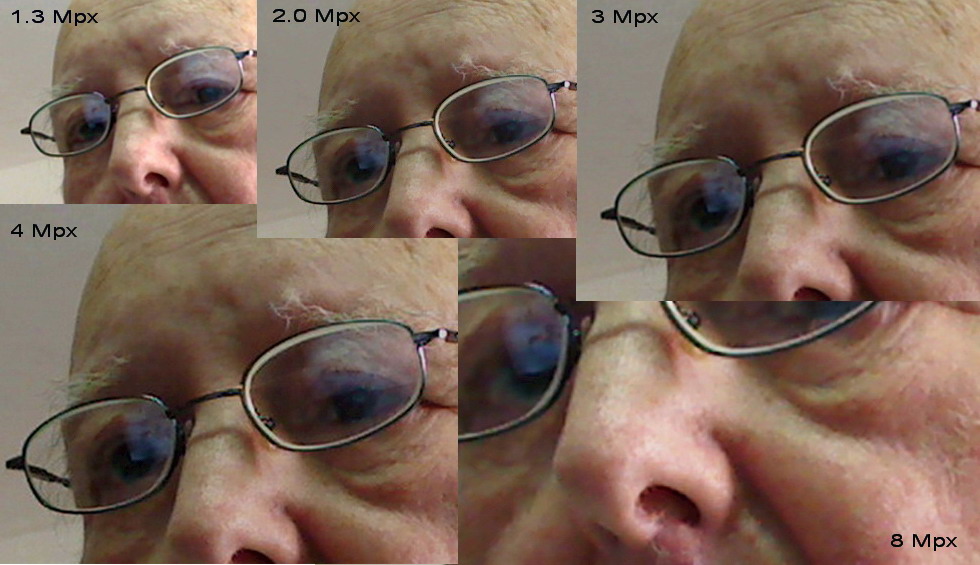
For a webcam, acting as a consumer one, I
found the results were excellent. But it also became evident (which the company does
not hide at any time to those who can read and understand the advertised features on
the camera) that what Logitech calls 1.3, 3, 4, and 8 Mpx are actually the
product of a digital resizing (enhancement).
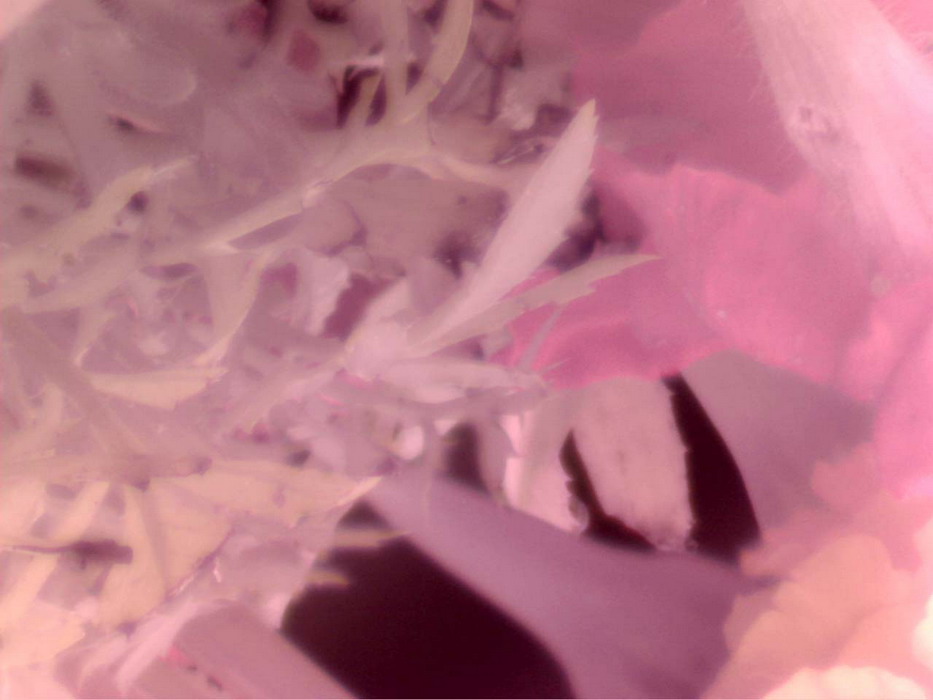
Removing the camera lens also means eliminating the infrared filter it has
attached.
The digital sensors are very sensitive to infrared (IR). To capture normal
colors IR filters are routinely attached in factory to the camera lens. But, when
removing the objective, the infrared filter is lost, and the sensor loses its
ability for accurately recording the colors.
|
|
|
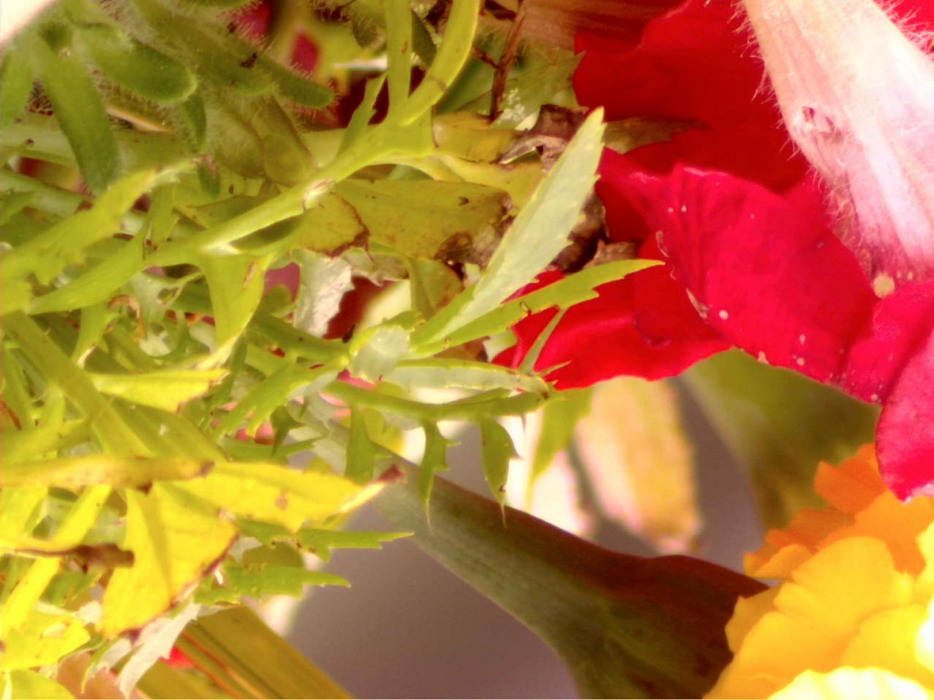
Logitech 9000 - Image with the IR filter in position.
http://ghonis2.ho8.com/Pro9000a.html
Without other facilities the webcam does not record what
photographers really know as infrared photographs. To achieve this (something
that rarely interests the photomicrograph amateur) it is necessary to filter
the remaining visible light, which amateurs get using one or more color filters
prepared with completely veiled color negatives. If some one is interested,
methods and results can be viewed at the following website: http://www.hoagieshouse.com/IR/ with two fine examples (pictures of a Lake) at
the end of the article.
To counteract the
effect of the removal of IR filter there are only two solutions:
1) reinstall an IR filter in the light path. Probably
the best place to put it is over the front lens of the illuminator. The
filter is expensive. If you have an old 35 mm slide projector, these have a
large IR filtering glass, built-in to prevent burning the slides with the lamp heat. Place
the filter over the lamp, at the foot of the microscope.
2) install in the microscope
"white" LEDs based illumination (that emits no IR)
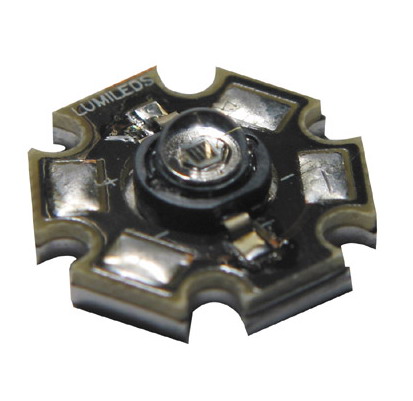
Although the choice
depends a little on the used microscope and camera, more useful modern LEDs,
are the 3W, lambertians, with 50-60 ° aperture of the cone of light, which
work on 1.5A, and consume 10V. A well-known, widely used mark is Lumiled.
There are commercially available microscopes equipped in the factory with LEDs.
http://www.microscopies.com/DOSSIERS/Magazine/Articles/JMC-ELECTRONIQUE/MICEL.htm
http://www.microscopies.com/DOSSIERS/Magazine/Articles/JMC-LEDS-2/LEDS2.htm
But it
also requires the possession of some tools, good eyesight, and sufficient manual skills.
One
example of a complete installation on a Swift microscope, with
an extensive discussion of the LED's characteristics and operation can be found in
http://www.microscopy-uk.org.uk/mag/artmay04/iwled.html