The inner epidermis of the onion bulb cataphylls
(the onion skin)
Easy and not so easy methods to work with
I am trying to make an onion skin preparation with none, or only a few, air bubbles under the coverslip. The usual wet mount preparation with iodine stain is not the answer as shown by the previous article.
Eureka! I say a fully matte surface ...
By association of ideas I also remembered that,
for a long time, the simple action of plain heat (around 50-60°C) is considered a
histological fixative by some, but most often by zoologists (definition of Fixative is easily found on the
Internet). For example it is the method of choice to kill with a more or a less
natural look, organisms from protozoa to rotifers to platihelminthes.
( http://www.microscopy-uk.org.uk/mag/artsep03/wdfixers2.html
http://www.microscopy-uk.org.uk/mag/artnov08/wd-rotifer3.html)
Intense heat precipitates proteins, and makes them insoluble, maintaining (approximately) the morphological structures of the organism under concern. All of us have, some time or other, boiled, or verified the result of boiling a chicken, or a carrot! However I had a doubt: boiled greens still keep their overall structure, but are always left soft, offer little resistance, some times wilted, and mushy (remember boiled Swiss chard or spinach).
Therefore I decided I must get to work and make the test, without waiting for the morning meal preparation. And I decided to give the test some formality. First, assess the boiling water.
FIXING WITH HOT WATER
Warning! The manipulations to be described are potentially dangerous. Please, if you are under 15, and wish to try the technique, please ask for help of an adult!
A) Boiling water
The first time, I boiled water over high heat. Reduced the heat to maintain boiling, and plunged the piece in. I let it boil for 1 minute. When I removed the heat, it floated on the surface. When I took it out, even suspended by tweezers, it rolls lengthwise. As well as I could, with the aid of a fine brush and mounted needles, I mounted it with a drop of Iodine.
As you can understand this was a long boiling water fixation, followed by a post-fixation and staining with the iodine tincture. This is not bad, zoologists use to do this trick.
Some times they kill and fix their samples with boiling water and post-fix with formaldehyde, glutaraldehyde, or other classic fixatives.
But for my present task I think it is better, in future trials, to separate fixation and colouration processes.
Can we add the stain directly to the epidermis, as we do with the iodine, without previously fixing it?
Well, there is a discipline called vital staining in which the live materials are submerged in very weak solutions of certain dyes and, after a more or less extended time, some of the organelles of the cell are depicted. You must follow this theme in MICSCAPE through the beautiful article(s) of Richard Howey (http://www.microscopy-uk.org.uk/mag/artfeb00/rhvital.html, and for other articles by him, search the Micscape library.)
But that what is called histological staining, gives a detailed chromatic analysis of the tissues or cell content, and implies a dead and fixed specimen.
As Bastin (1890) said, the Iodine first kills, acting as a fixing agent, then stains, linking to the proteins of the cell.
I propose later an experiment to demonstrate this inherent division of work between our reagents. (See next month's article in this series, and its fig.5.)
Let see the results of my actions up until now.
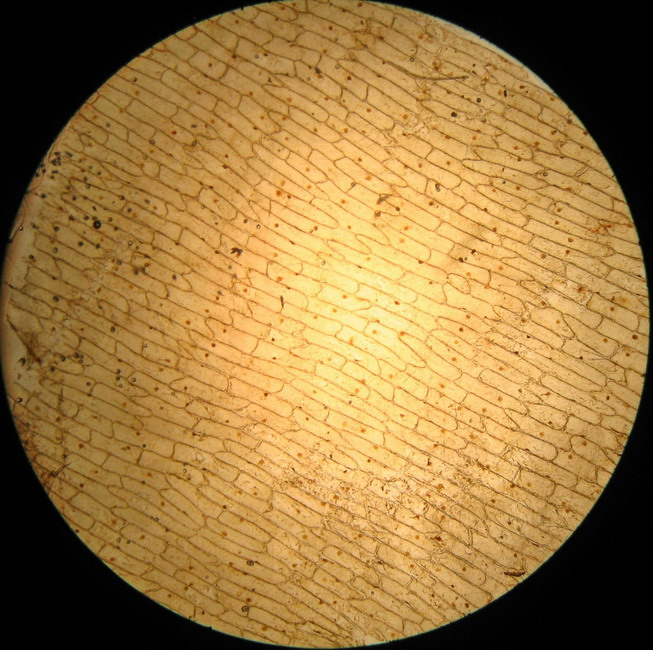
Fig - 1 The total field of view with the 4x objective.
The test produced conflicting results. THERE ARE NO BUBBLES over the entire piece. But the sheet was most soft, very difficult to work with; a few cells show clearly a start of plasmolysis.
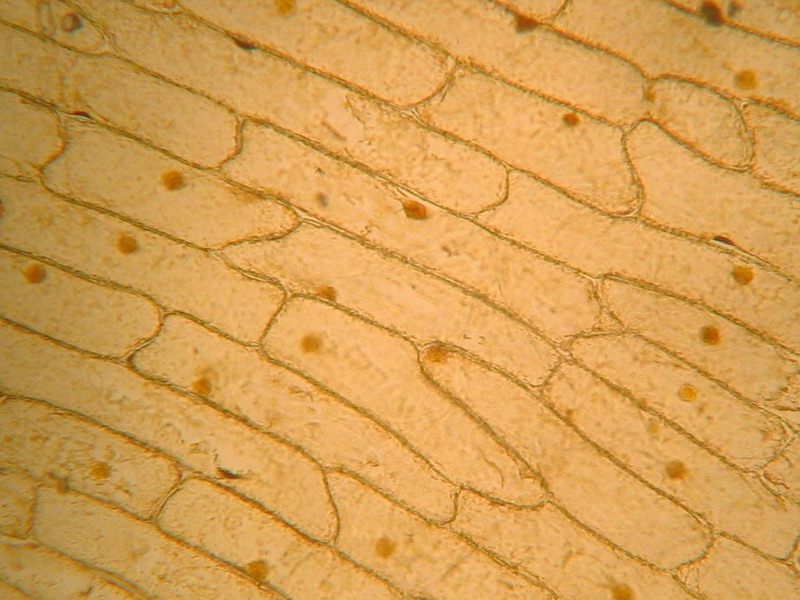
Fig. 2 - 10x obj well defined cell walls, nucleus stained but not well defined, cytoplasm dense. Note the clear gaps between some cells. It seems like the middle pectic lamella was dissolved and cells are nearly loose. See in this same issue of Micscape Magazine, the first image (rollover) of the companion article The use of Brillant Blue #1 as a nuclear dye
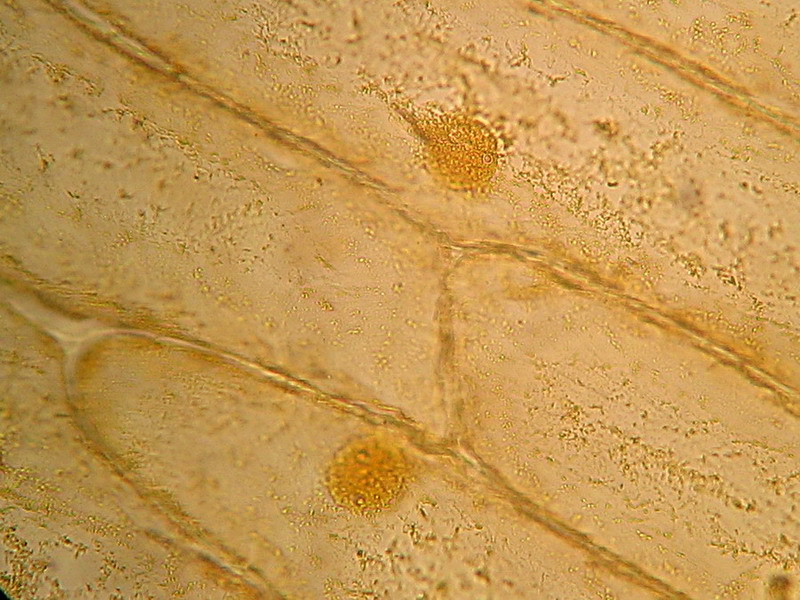
Fig. 3 - Boiling water, 40x obj, cell structure acceptable, nucleolus inconspicuous, granulations in cytosol big and round, strands of cytoplasm evident. Cells loosely packed.
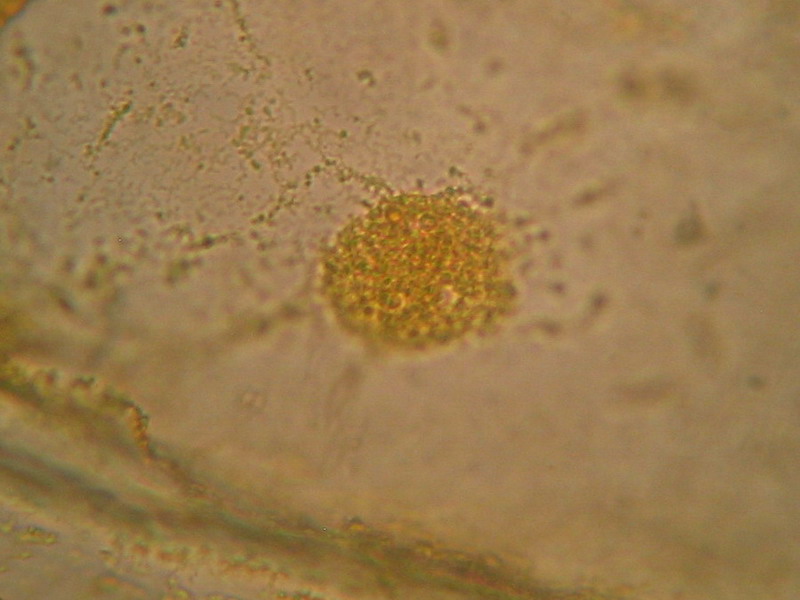
Fig. 4 - 100x obj. One nucleus and its surrounding cytoplasm. Two, possibly three, nucleoli. Or there are more? Or less?
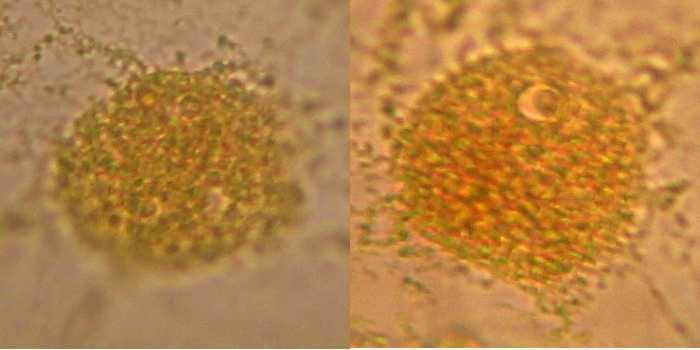
Fig. 5 - 100x obj. diffuse nuclear border, a different and coarse texture, nucleolus sometimes difficult to identify. Poor image of nuclei.
I conclude that this is not a good option. Mostly because I had trouble taking out the epidermis from the water, because it rolls and is difficult to extend, and I also had difficulties working the wet-mount because the sheet is very soft and breaks apart. The main disadvantage is the poor nucleoli display.
Definitely, freely boiling, even FOR ONE MINUTE is not a good treatment for onion epidermis. Cytoplasm is highly concentrated, and although the cytoplasm trabeculae are clearly visible between the wall and the nucleus, as well as fine grains contained in the cytosol, the overall picture is not natural, and cytosol is near plasmolysis.
If to do "puchero" with the onion is not appropriate, despite the fact that it is efficient in providing layers of epidermis which can be mounted without bubbles, perhaps it's best to use the method that zoologists and parasitologists use: water at 60°C. This technique is a method to freeze ( its very ironic) the morphology of little animals without giving them a chance to shrink and become unrecognizable. Surely this is why I dont find any reference of their use in Botany, whose subjects dont have rapid movements.
After some trials I concluded that my best method to use hot water is this:
I prepare one or more peelings, and put them in reserve in some fresh water.
I put a little water (1/2 Cup) in a container that resists sudden heat and has a volume of at least 4 times the water I put in it, and, at once, I poured in a volume of ¾ Cup of hard bubbling boiling water (controlled with my thermometer, temperature rises to 60 °C). If you try, dont change the water proportions. I immediately fished out the reserved epidermis, and plunged it in this water. It plunges easily. I let them sit for 5 minutes.
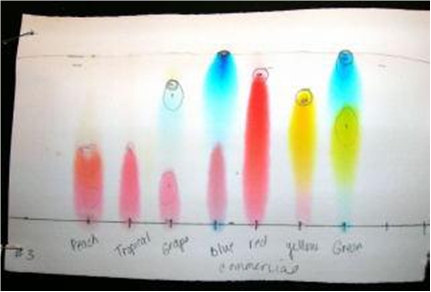
Fig. 6 - From : http://www.apsu.edu/files/chemistry/Paper_Chromotography_of_Food_Dyes_and_Colors_RF8.pdf
I know it only as an aqueous solution, with methylparaben (a fungicide) added as a preservative. Believing in Wikipedia, FD&C Blue Nº1 is a synthetic dye (a triarylmethane), a reddish-blue powder, which solutions has an absorption maximum around 628 nanometer. And Allura Red is a dark red powder with maximum absorption at 504 nm.

Fig. 7 - The workplace one fine pointed tweezer is really the only required tool, but one or two mounted needles can aid.
I use 0.6 ml of the dye, as it is provided, and make up to 10 ml with distilled water (demineralised water for steam irons). Hypodermic syringes are good for this task. I take the piece out of the hot water, plunge it in water at ambient temperature, pass it to the dye, and give the onion skin a bath of 10 minutes. Previous trials with less time were not good. I take one end with my tweezers and wash out the excess colour in a bath with plenty of fresh clean water (1 minute). Pass to the final wash (30 seconds) and mount the sheet in one drop of water, absorb excess water.
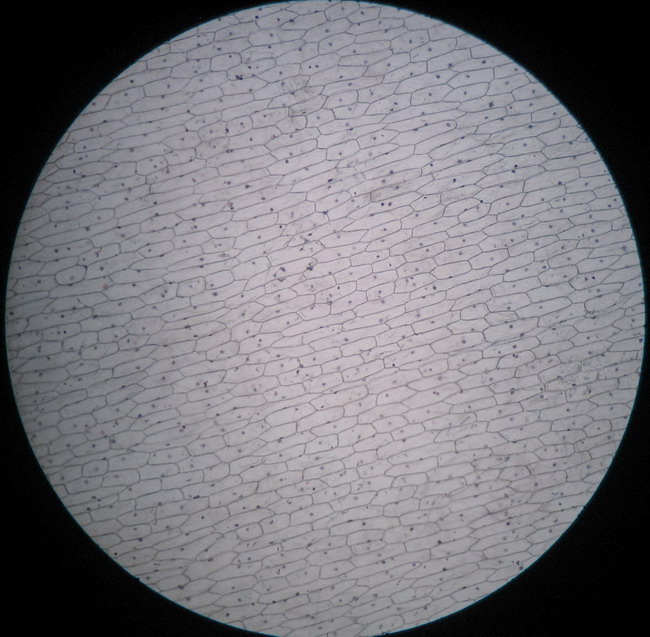
Fig. 8 - 4x obj. NO BUBBLES AT ALL!!
The dye stains the epidermis with a deep but transparent blue. The excess is only linked to the mesophyll, and drop easily into the first washing bath, very little colour is released in the second bath.
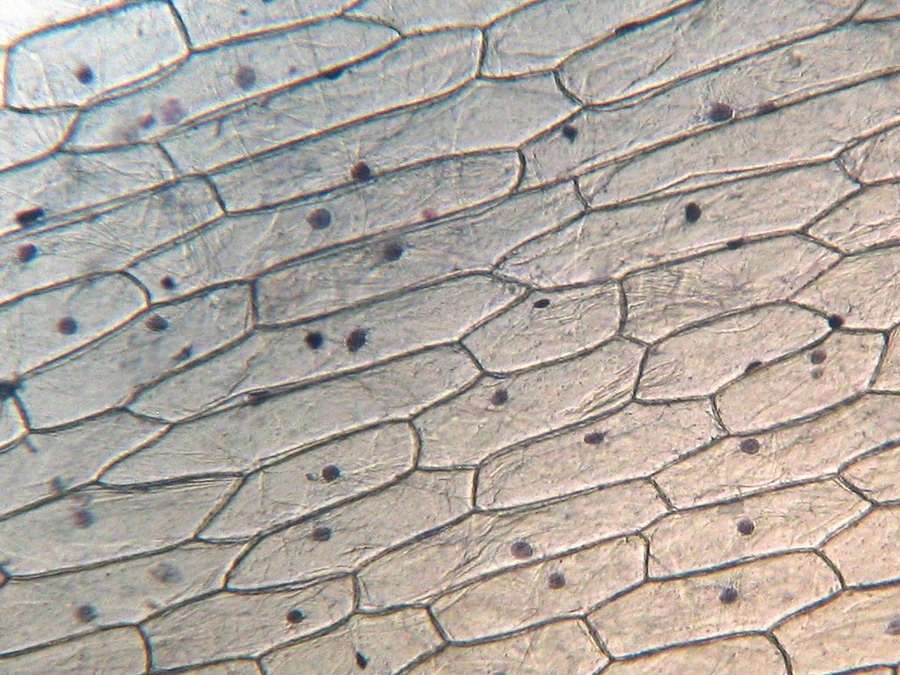
Fig. 9 - 10x obj. a hint of oblique illumination, good cell delineation, dark nuclei.
Cytoplasm scarcely tinged, it seems that the Blue 1 qualifies as a nuclear stain.
Chris Robinson, a fellow from the group "Amateur microscopy", tried the same blue most probably from the same manufacturer, with oral epithelial cells. His result was negative; the dye does not stain the nuclei. I did the same test, with my own cells suspended in water, and the result was similar. Applied to the inside of my cheek epithelial cells, Blue 1 did not stain the nucleus.
The difference between the results of Chris and my own cheek test, with the onion nucleus staining, may be due to various causes. Because of this, and in order not to burden this article, I presented in a note aside: The use of Brillant Blue #1 as a nuclear dye a more detailed statement of the problem.
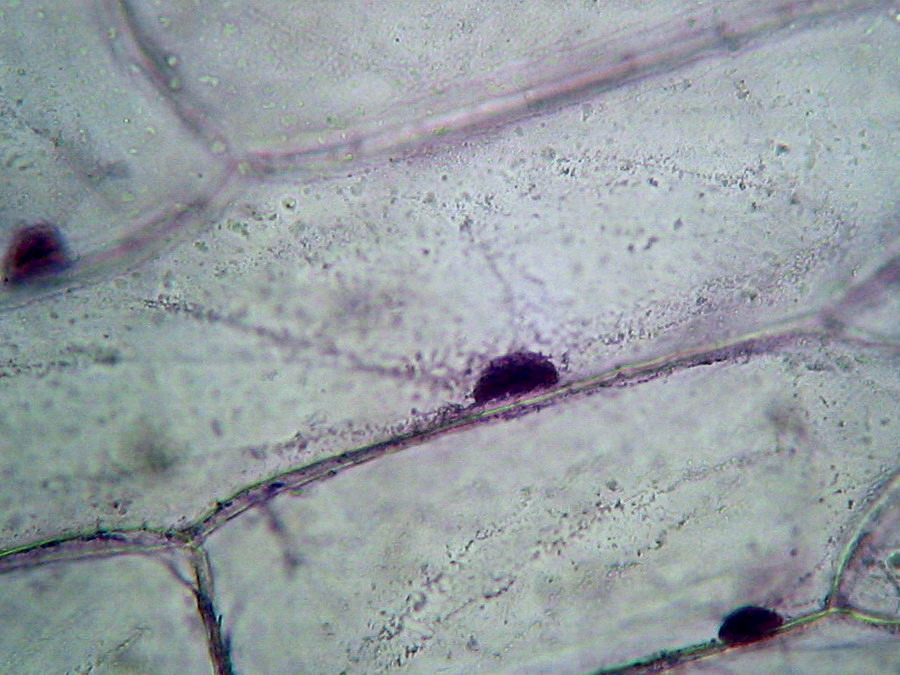
Fig 10 - Nucleus, 100x OI, cell sap clear, parietal citosol layer evident by their inclusions, probably mitochondria (most of them are stained), to show the cytoplasm strands colour was a little forced, nuclei are dark. Logitech 9000.
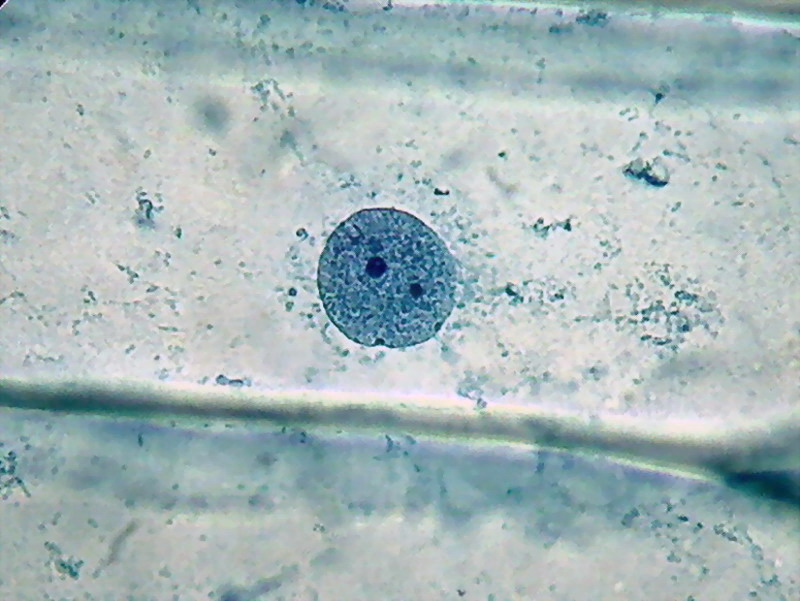
Fig 11 Another nucleus surrounded by the cytosol bands filled with mitochondria and possibly other plastids. 100x OI, Logitech 9000. In these last two pictures the low resolution of the Logitech gives an image of nuclei texture inferior to that captured by the 3.2 Mpx Canon (see the last picture selection).
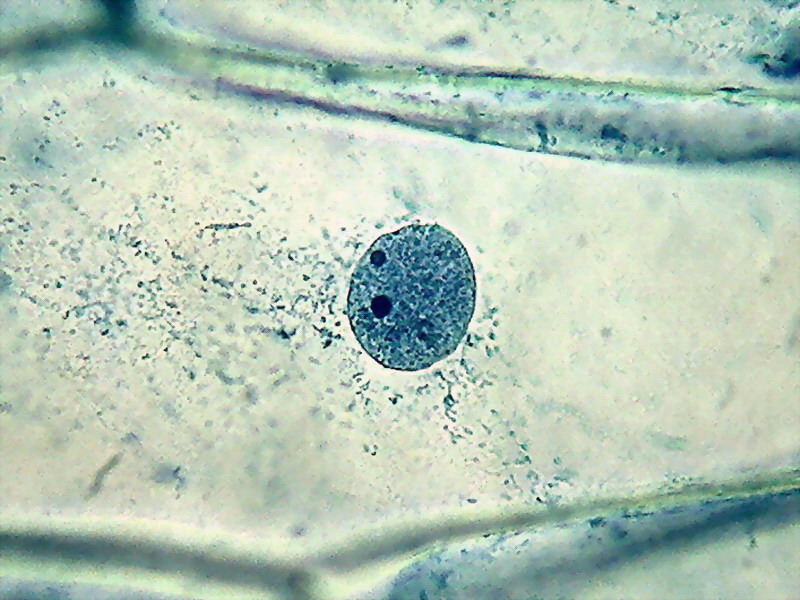
Fig. 12 - 40x obj. A nucleus included in the parietal layer of the cytosol. Strips of cytosol radiate through the cell central sap. To better see the cytoplasm, staining was a bit forced, nuclei are dark. Canon A75.
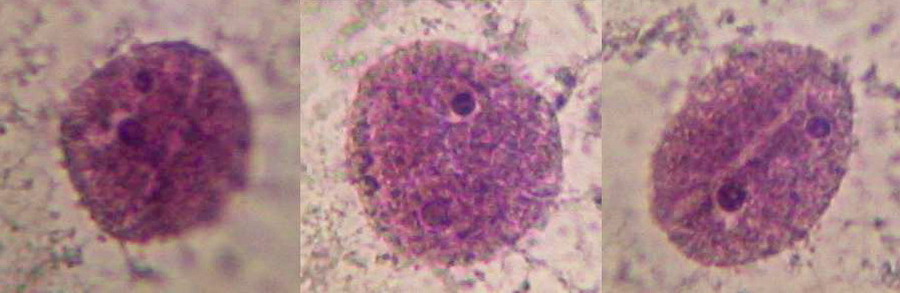
Fig 13 - 100x Obj. Nuclei stained purple with Blue 1, cropped 1:1 from the images of Canon Powershot A75. Good shape and texture, prominent nucleoli, clear surface grooves. No image wo9rk-up other than to enhance contrast most moderately. It seems that colour depends a lot upon the individual onion you are processing, and the treatment you apply; a pH response perhaps?.
http://www.microscopy-uk.org.uk/mag/artmay04/wdstains.html
But blue is more fashionable for nuclear staining (remember that the two most used professional options are methylene blue and hematoxylin). So I stick to my Blue 1 choice.
But ... after describing the previous manipulations, anyone will realise that cooking (successful or not) is not a methodology for the demonstration of the structure of cells to a group of young students, nor in the time of a lab practice. Too risky, too slow... and too complicated. But this technique can let a teacher prepare some good onion skin demos, ... or give some satisfaction to a demanding amateur who-does-not-like-bubbles!
The question remains whether the Blue 1 dye is a durable one, such as Gentian Violet is, for example, or if the colour will fade over time. For the moment, preparations mounted in diluted glycerine some months ago are as clean and blue as in the first moments.
Will there be another technique to dispose of the nasty bubbles, and to achieve this same result, without recourse to the boiling water?
Well... I have some more ideas to explore, following suggestions of my association of ideas brain machine... This, I go on to explain next month.