How to Make Rheinberg Filters
by Michael Shaw, USA
In preparing for this article, I did a quick search of Micscape and uncovered over fifty references to Rheinberg filters. So, I thought it would be nice to incorporate some of the material that has been previously contributed, crediting the authors. This will save Micscape readers some time searching for already published information on the topic of Rheinberg filters.
Why am I adding yet another article on the topic? The publication of my book How to Make Rheinberg Filters for the Hobbyist and Professional has generated a great deal of interest on the topic, and I get many e-mails on the subject. Internet blogs and forums buzz with questions and comments, which blip on my Rheinberg radar screen. By sharing here at Micscape some of what is in my book, I will have place to point people to for all things Rheinberg, and all things microscopy.
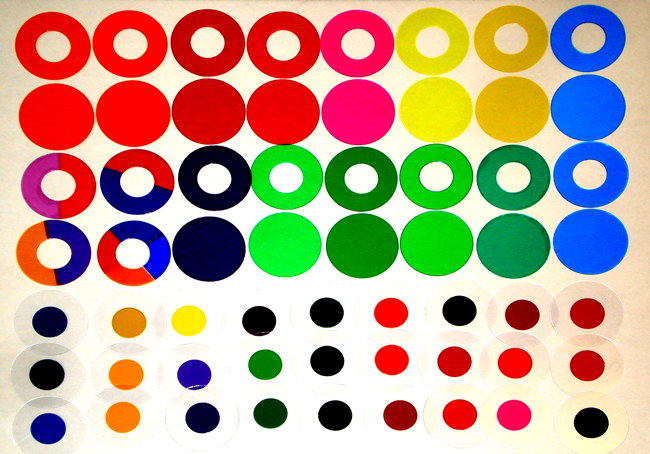
Let’s start with what Rheinberg filters look like. Here is a full set of Rheinberg filters, including some solid colored filters. The “rings” are called annulus rings, the clear filters with a “dot in the middle” are called center stop filters (or patch stops), and the solid-colored filters are simply colored filters- non-Rheinberg filters. All are made of thin plastic, by hand.
Even if you never heard of Rheinberg filters, you can achieve some very nice effects with solid colored filters. You simply place a colored filter in the light path, and then illuminate your specimen with bright white light from above. Take a look at these salt crystals.
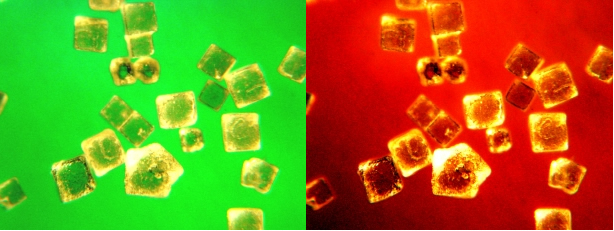
Each photo was taken using solid colored filter, and by using a fiber optic illuminator above, to light up the crystals. You can use any bright LED flashlight to do the same. LED flashlights are abundant, and inexpensive, and great for what is called incident lighting, lighting from the top of the specimen outside the microscope optics chain.
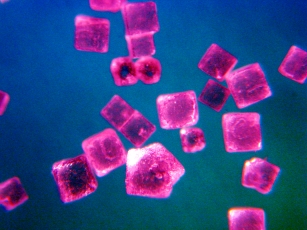
The difference between using the above technique and using Rheinberg filters is that you will not need an external light source to illuminate your subject. The annulus ring does this job, while the center stop colors the background. Here are those same salt crystals using a Rheinberg filter.
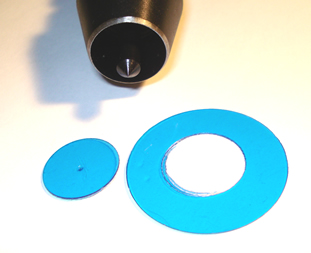
Rheinberg filters create the background color by using a center stop filter. The center stop filter is actually a clear disk, with a dark patch of color in the middle (pictured below in green).
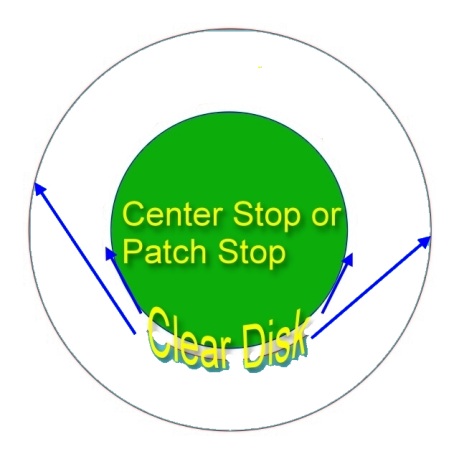
This center stop only colors the field, or background, yet it also allows the rest of the light to pass around it and color the subject. The clear area allows light to illuminate the specimen.
The annulus ring (turquoise in below picture) colors all of that remaining light which passes around the center stop Filter.
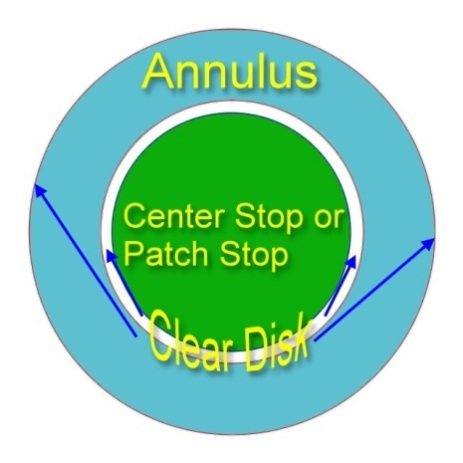
Therefore, a Rheinberg filter is really two filters - a combination of center stop filter, overlaid by an annulus ring. Some Rheinberg filters are combined permanently into a single filter, but in reality, all Rheinberg filters are a combination of center stop and annulus doing their respective jobs.
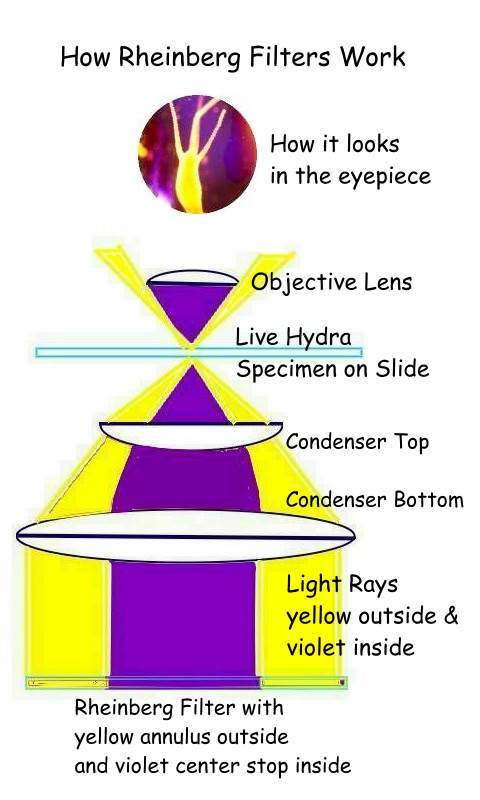
Here is a little diagram showing what happens when you use a Rheinberg filter.
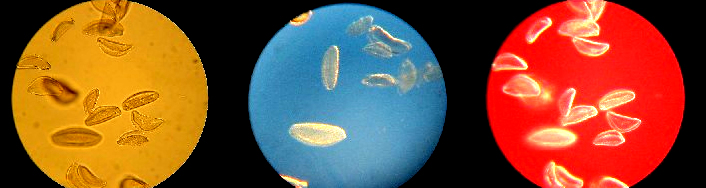
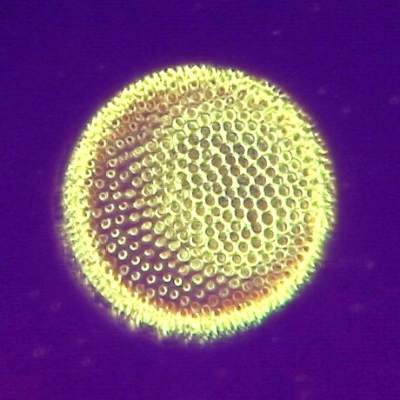
The Rheinberg effect: Here are three pictures of pollen grains. Left shows pollen without any filter at all, in yellowish incandescent light. Center photo shows same pollen with blue center stop and daylight blue annulus ring. Right photo shows pollen with red center stop and daylight blue annulus ring.
Rosemarie Arbur, in her Micscape article on filters, so nicely points out the need to correct yellowish incandescent light to daylight blue, and the many how-to’s of doing so. She shows us as well another good source for scientific supplies, one of my favorites, American Science and Surplus. Ms. Arbur specifically calls our attention to this company’s optics section.
Wim van Egmond has some astounding photos using Rheinberg and other types of illumination in his Micropolitan Museum. Wim has won contests with his work, and his photos are truly an inspiration for us all.
It is important to point out, and save you time in your experimentation, that Rheinberg filters generally will not work with objectives greater than 40x. Chuck Huck explains this in his article in Micscape, saying that a special Darkfield condenser is required with higher powered objectives. You should reasonably expect to achieve the Rheinberg effect with your 4x, 10x, and objectives up to about 20x, these being achromatic objectives. Expensive Neofluors will give you some trouble; avoid them for Rheinberg tests.
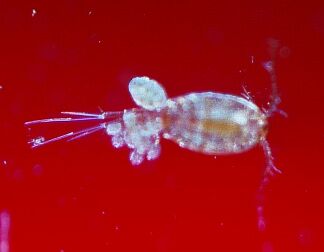
Most pond life and small micro-organisms look just fine with a 10x objective. That’s where Rheinberg filters give their best performance.
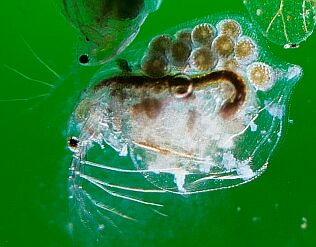
If you were to fix and stain various forms of pond life to achieve contrast, you would get nowhere near the quality that you see when looking at a live specimen. Permanent slides make pond life barely recognizable. Using Rheinberg filters (optical staining as it is called) is one of the best ways to look at and photograph pond life in its most natural state.
For a quick comparison between Brightfield, Darkfield, Rheinberg, Oblique Illumination, and Crossed Polarization, you can see some nice comparison photos in Dave Walker’s Micscape article about ordinary household items under the microscope. Richard Haynes, likewise, shows us a comparison between Brightfield and Rheinberg in his article on the Black-eyed Susan flower stem.
Okay. Those are the basics. Are you ready to make Rheinberg filters? You will need some tools and some materials. Tools consist of things you use to make holes and disks; the materials consist of colored plastics and papers to make your clear disks, center stops, and annulus rings.
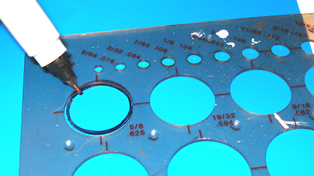
The most important part of about making any kind of microscope filter is getting the size right. You can use artist templates, or even trace circles from one of your existing filters.
You can cut out your circles, disks, and center stops with scissors, or you can use a compass cutter to create your own circle template from an old credit card. Then use that template to trace your circles.

Wim van Egmond has a great article here in Micscape involving the use of a compass cutter and clear cellophane tape. Wim provides illustrations showing how Rheinberg filters work, and a short animated tutorial on how to make them. Wim leads the way in clarity and brevity his Micscape article.
Using a compass cutter takes patience, and some trial and error to get the exact size circle to match your filter size. Once you have that correct size circle template, however, you will be able to draw precision circles of the size you need on any type of material. This is much easier than using a compass cutter to cut out individual filters, one at a time.
If you do want to tackle the compass cutter challenge, then read Ian Walker’s article here in Micscape on just this topic.
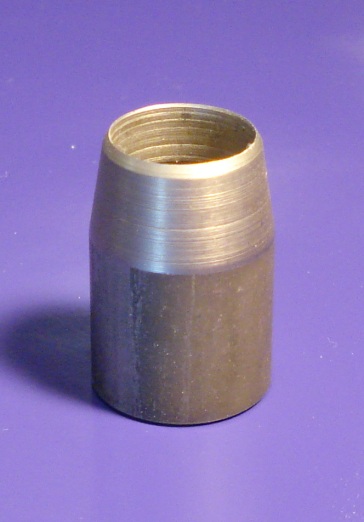
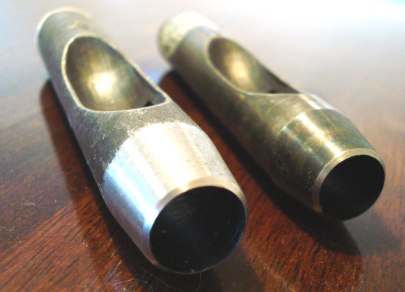
You can use various punches as well. This is the most accurate way to make filters and center stops. Do you need to buy an expensive set of punches? Not always. If you can determine the exact size center stop you need, you may only need to buy one or two punches. Small industrial tube punches will do the trick, but they are hard to find.
You can buy hand punches like the ones below, at a reasonable price, but remember to use a cushion underneath, of plastic or wood. A kitchen cutting board made of plastic will work. Art supply stores sell cutting mats which are even better.
The best punch set I’ve seen is available in England from Axminster Punches. It is a deluxe set called Boehm-Boehm. It may seem a bit pricey, however, it covers every possible center stop size you would need, as well as most standard outer diameter sizes of microscope filters. I’ve contacted the company and they will ship to USA, but of course the international shipping adds to your cost. Here is the link to their site: http://www.axminster.co.uk/boehm-boehm-hollow-punch-sets-prod22429/
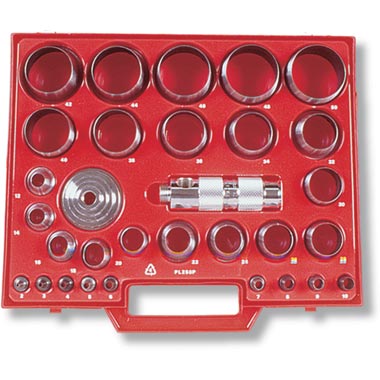
If you buy these, please share your reviews on these Axminster punches with Micscape! We would all love to hear how they work.
There are smaller sets of similar punches sold in USA, called Osborne punches, and these have a centering point. They leave a dimple in the piece that is cut out, and thus you can use these punches only for cutting out the centers of annulus rings. If you were to use Osborne punches to make center stops, you would have to put a piece of cushioning material where the center punch strikes, in order to protect your center stop from getting a hole or dimple.
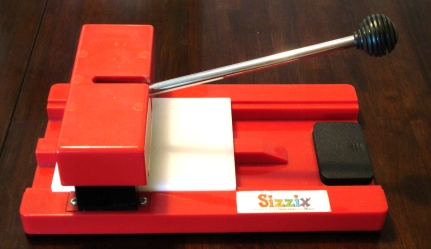
David Walker gives Micscape some Topical Tips on tools for hole making as he covers hand punches, cork borers, and the compass cutter. Personally, I’ve never used a cork borer, and my preference is for short tube punches, and a small hobby press called the Sizzix Press, which slowly pushes the punch down through the material. Unfortunately, you can only buy these presses used on EBay, and I’m guessing they would only be available in USA. In Europe, Asia, or UK, you’ll need to find some similar type of hand press. Please share your discoveries by sending an e-mail to me.
That is a brief summary of the tools. How about the materials? A trip to some hardware stores, art supply stores, craft shops, and discount stores will yield lots of ideas.
What you are looking for are semi-opaque colors for center stops, clear material for disks on which you will mount the center stops, and semi-transparent plastics for annulus rings.
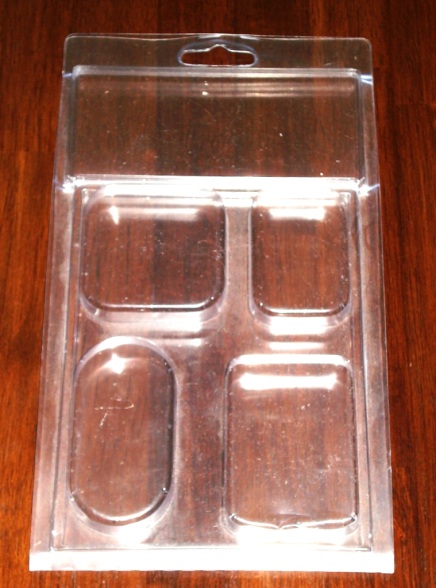
Clear sheets are abundant, and you could even use pieces of the plastic bubble packaging in which products are enclosed. These hang from racks on all the store shelves. Rosemarie Arbur mentions these clear plastic product packagings in her comprehensive filters article, down in her section called “The Right Stuff.”
Various clear sheets of Acetate or Mylar are sold for computer printers, for binding reports, and people have even printed their Rheinberg filters on these sheets, and then cut them out by hand. You can use various individually sold report covers, as well.
Colored semi-transparent materials are a bit harder to find, and one good source of material is a theatrical supply store. Colored gels for stage lighting come in every imaginable color, and although these tend to be thin to work with, they do serve the purpose and will give you a wide variety of annulus ring colors. “Lee Filters” are really theatrical gels, and apparently are available in UK in an educational pack. Ian Walker tells all about these and has some great pictures in his Micscape article. Also in Micscape, Chuck Huck gives us an excellent article on the history of Rheinberg filters, and recommends clear acetate sheets from Edmund Scientific. This company is a great source for science hobbyists, and they have all kinds of microscope related products as well.
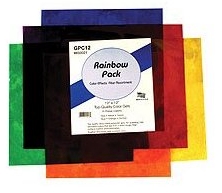
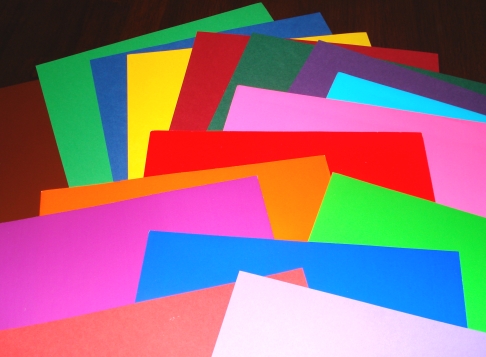
Center stop materials are the easiest to find. One of the most basic and abundant center stop materials is construction paper, also known as craft paper. Even gift wrap, and scrapbooking sheets of paper will work. The density must be right, and must allow some light through, which will reveal color, yet remain dark enough behind your brightly illuminated specimen. You can test various materials with a pocket torch, as they say in England, a small flashlight as we say here in the USA.
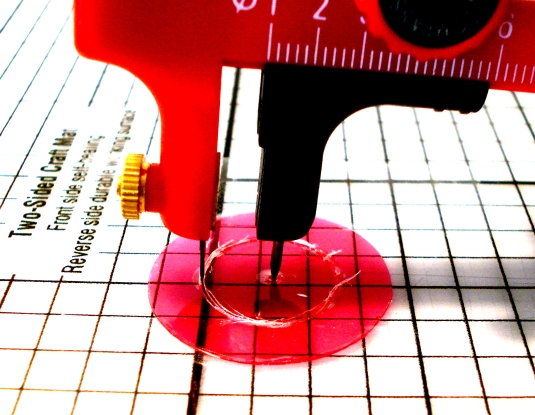
Then, cut out by hand, or punch out center stops and simply glue them to clear plastic disks. Office supply stores even sell colored sticky dots that can be used as well.
David Young tells us in his Micscape article that he foregoes all of the above, and simply sticks microscope slides to the bottom of his condenser, each having a center stop glued to the slide.
You will quickly find that the art, and indeed the fun, in making Rheinberg filters is in the experimentation and in the trial and error process. Discovering which materials work best with your illuminator, and determining precisely which size center stops work with each objective is what makes it all worth the effort.
Science is about discovery, and being able to repeat what works. By taking upon yourself the task of making Rheinberg filters, you are adding a deeper dimension to your enjoyment of the science of microscopy.
I have manufactured and sold sets of Rheinberg filters for many makes and models of microscopes, new, old, and antique. When the famous author and microscopist Mort Abrams needed a set of Rheinberg filters for his extremely rare Mikropolychromar attachment, he came to me. Requiring extreme precision to meet Zeiss standards, I created a custom set of filters in colors he never imagined he’d have for a device designed almost a century ago. Micscape contributor Alain Berjonval gives us a great article on this special Rheinberg condenser.
For the past ten years, I’ve made filters for universities around the world, for the Mayo Clinic, for professors, industrial scientists, hospital researchers, doctors and veterinarians on every continent, and for amateurs, of course, as well. Finally, I wrote a book on the subject as well.
Yet, I started out like you! I simply wanted to make a set of Rheinberg filters for myself, and have some fun seeing if I could do it. I urge you to take on this challenge, and enjoy taking some great photos through the microscope. Spike Walker’s stunning images using Rheinberg filters and crossed polarization never fail to amaze, and if you need some motivation, just take a peek at his work here at Micscape. Then, share your pictures with us on the forums, or add your own discoveries to Micscape’s body of articles on the topic of Rheinberg filters.
Good luck, and most of all, have fun!
Michael Shaw
Website: mikeshawtoday.com/rheinbergbook.htm
Article Copyright Michael Shaw 2011
All
comments
to the author Mike Shaw are welcomed.
Published in the
December 2011 edition of Micscape.
Please report any Web problems or
offer general comments to the Micscape
Editor.
Micscape is the on-line monthly magazine
of the Microscopy UK web
site at Microscopy-UK
© Onview.net Ltd, Microscopy-UK, and all contributors 1995 onwards. All rights reserved. Main site is at www.microscopy-uk.org.uk.